|
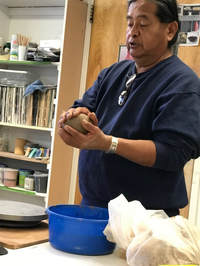
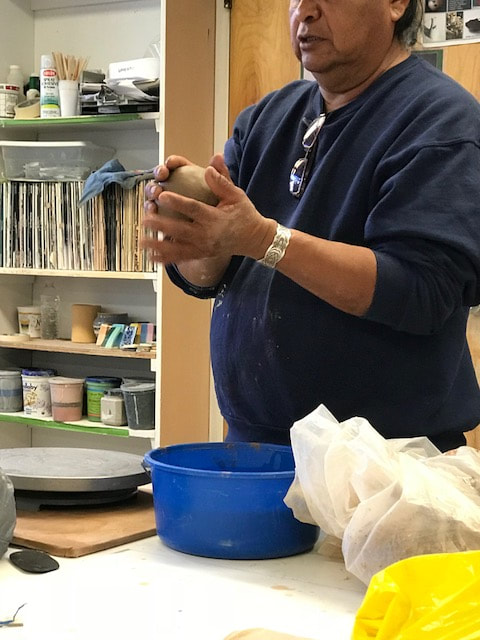
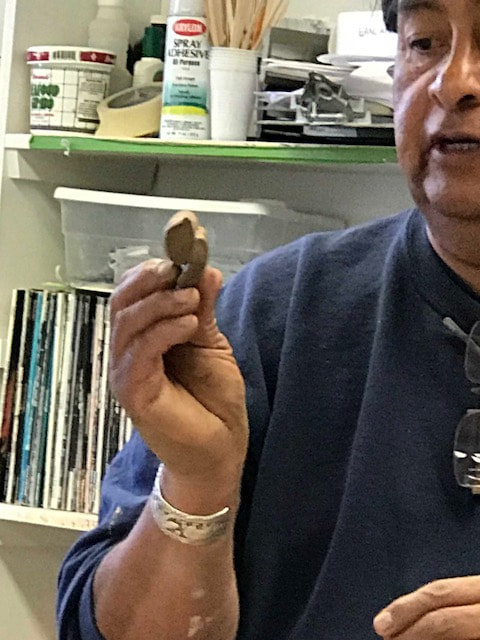
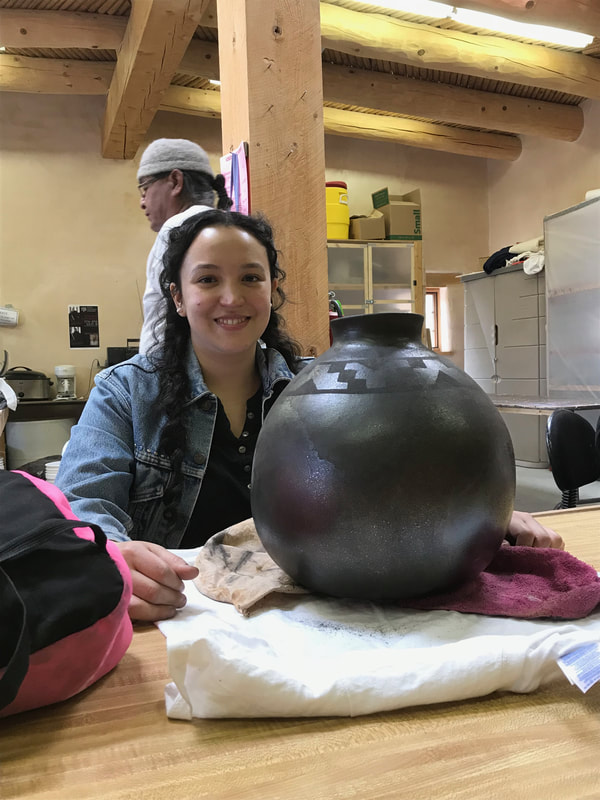
UNM - Dept. of Fine Arts.
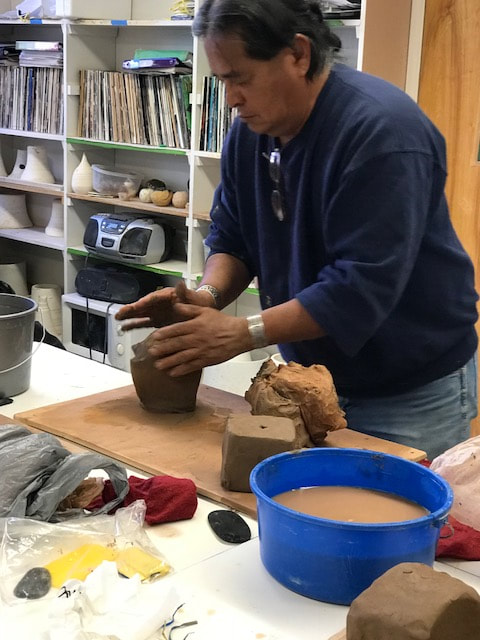
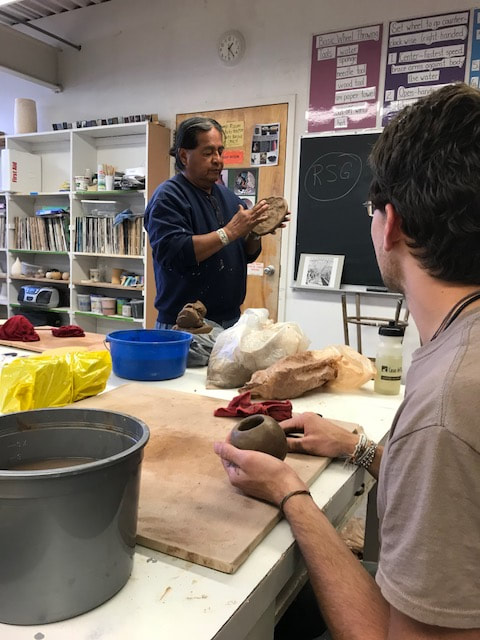
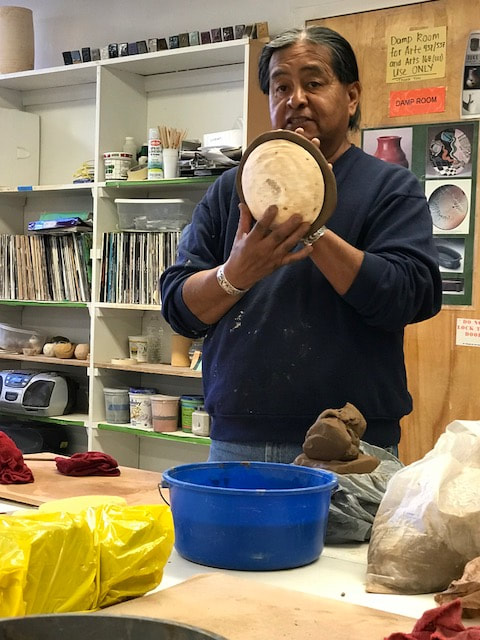
Prof. Clarence Cruz from Ohkay Owingeh Pueblo Spring 2018 |
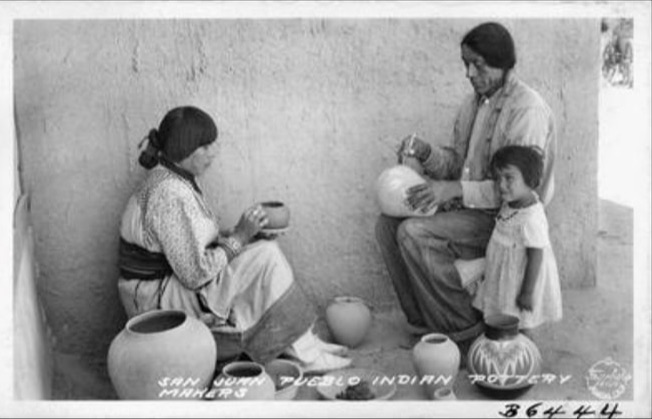
Potters from the Ohkay Owingeh Pueblo. 1937
|
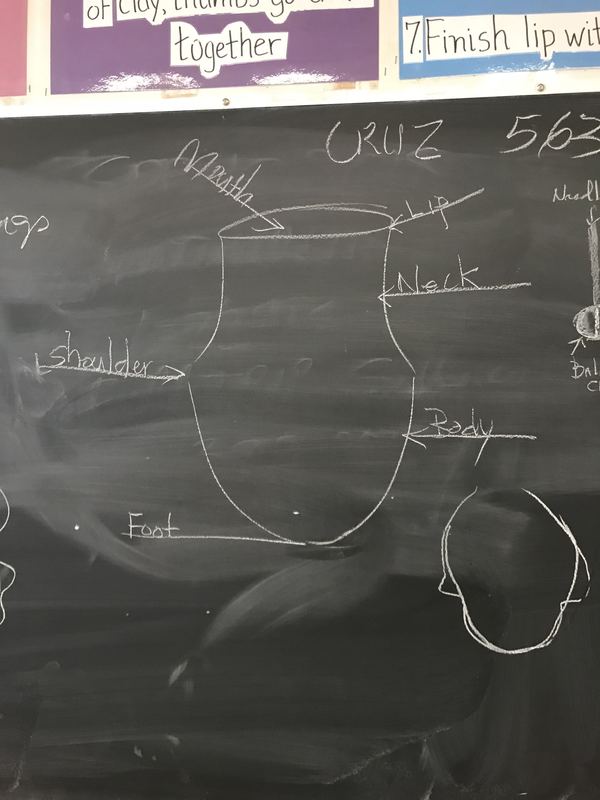
Pueblo pottery
JANUARY 19, 2018
- Unlike conventional ceramics and wheel thrown pottery, there is only one firing.
- Pots are formed, smoothed, polished, decorated, painted and dried all before one and final firing.
- Pots are started as thumb pots or in a "puki" and then extended upwards with coils.
- Coils are added to the inside surface. Not on the top edge like conventional pots
- Coils are rolled with palm /ball of hand – not fingers, to get a round sausage.
- Once height of cylinder is achieved, then the pot shape is formed from the inside, pushing out with forming ribs, stones etc.
- Clay is constantly wedged to remove air.
- Drying is done slowly in drying room under plastic.
- Final drying is done in conventional kiln to pre heat temps.
- Firing is by wood burning – either in oxidation or reduction.
January 28, 2018 - Ohkay Owingeh Pueblo Festival to welcome new Council members.
February 2, 2018 - Santo Domingo Pueblo
madrid clay
JANUARY 19, 2018
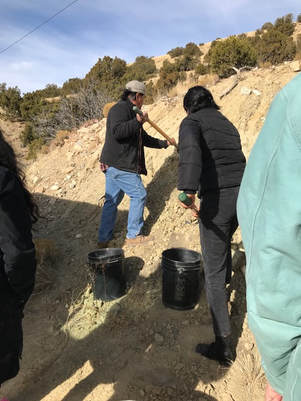
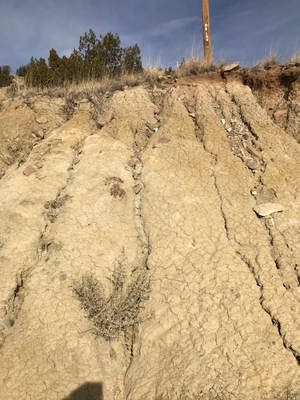
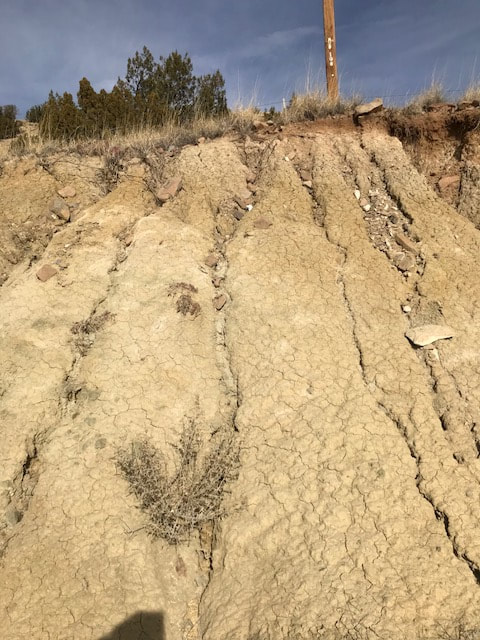
DIGGING
- This clay is for decorative use only – non functional pots. - It cannot withstand high firing and remains porous.
- Retrieved from roadside cutting north side of Madrid, on Rte.14.NM
- Test sample with water to check plasticity.
- Offer thanks to the earth, telling her what you intend to use the clay for and thank her.
- Bless her with corn starch (holy water)
- Dig clay into bucket
- Repair earth and fill in where dug.
- Further blessing and thanks.
|
|
** Any clay on public land can be harvested. NOT ON PUEBLO / PRIVATE / RESERVATIONS/ LAND GRANT PROPERTIES.
BLM (Bureau of Land Management) and Forest Service will issue permits and maps where to retrieve up to 5 gallon bucket of clay. – Minerals department. – for artists use, not commercial use.
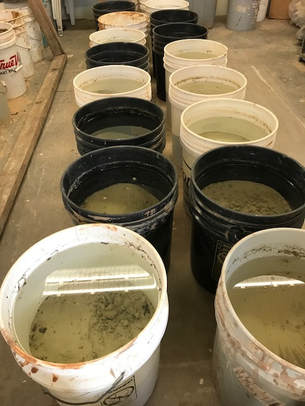
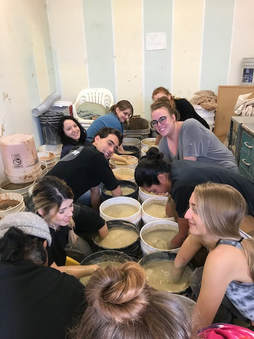
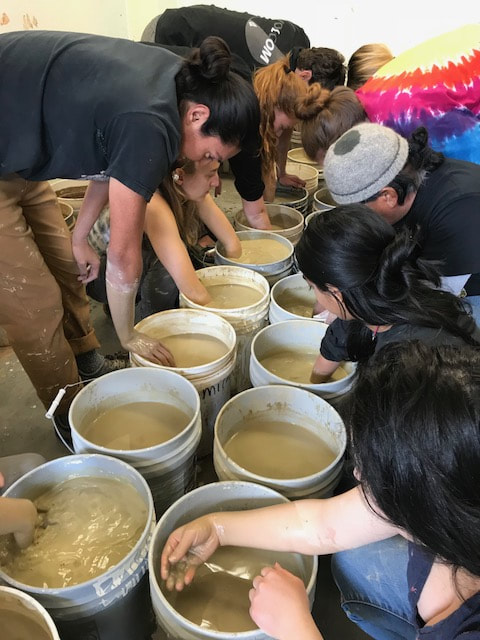
SLAKING
- Fill 5 gallon buckets up with ½ clay material , top up to the top with water and leave for a week for the water to absorb into clay particles and separate from larger rock particles.
- After a week, clear water will be visible at the top of the bucket.

|
|
JANUARY 26, 2018
|
SIEVING/PROCESSING/CLEANING
|
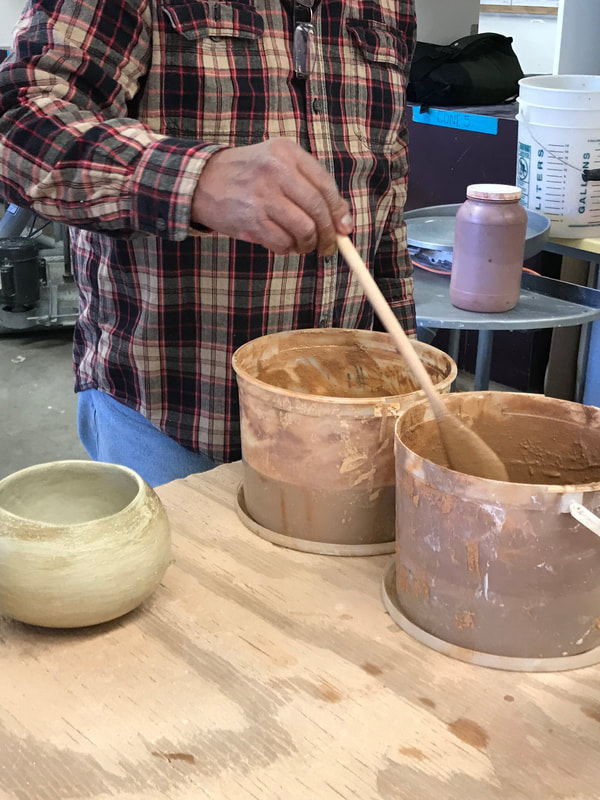
Stiring to break up the settled clay and mix in water
|
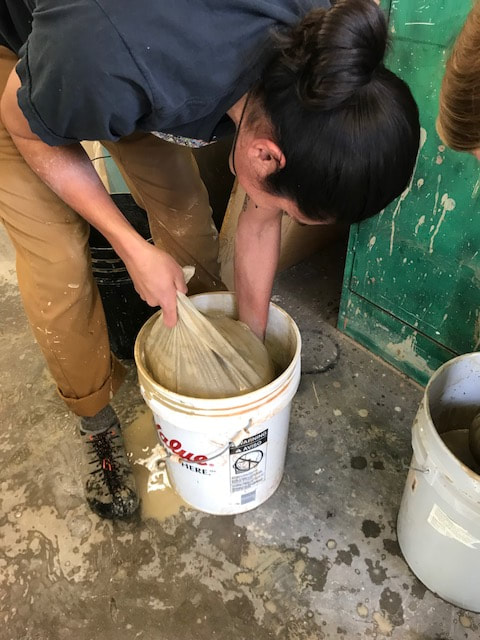
- Pour contents, a bit at a time, through a nylon sieve bag into a second (clean) bucket. Aggitate original bucket before refilling sieve bag.
- Squeeze bags and agitate to wash all clay particles through. Do not be too aggressive or sharp particles can tear bag and cause the clay slip to get 'contaminated'. If this happens re-sieve the entire contents.
- All large particles and vegetative debris remains in the bag. Collect in a 'slops' bucket and dispose of them appropriately (not in the sewer system). Wash out sieve bags for reuse. ** Note: use bags with seam on the outside.
- Care must be taken not to contaminate 'cleaned' clay/water mix, by consistently rinsing hands between mixing and sieving.
|
|

|
- Allow filtered slip mix to settle again.
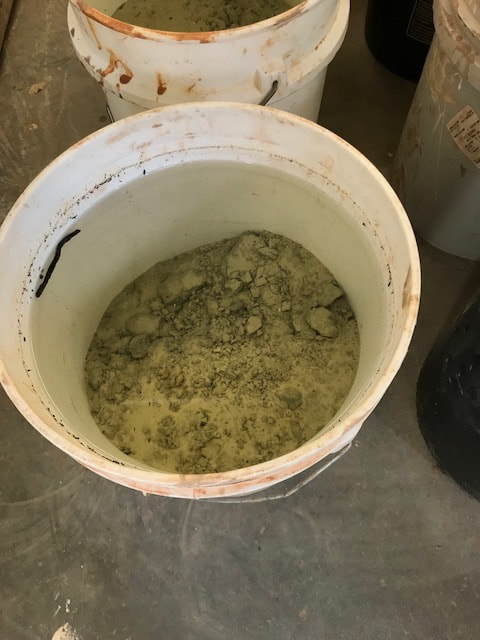
- Add 48oz of powered pumice to a 5 gal. bucket of slip to 'temper' the Clay
- Mix well and leave to settle for a week.
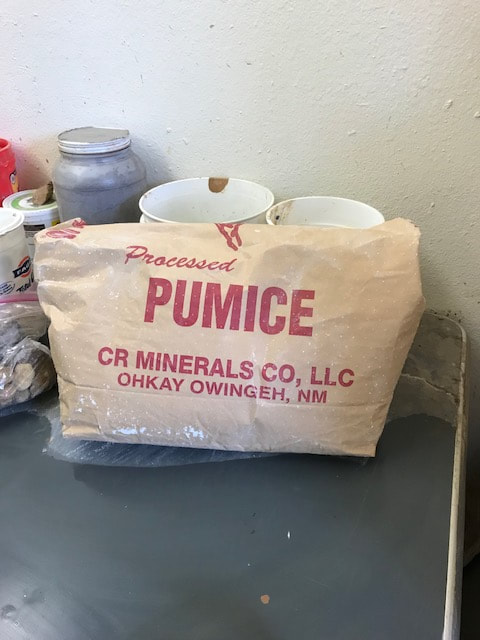
Volcanic ash as a temper
|
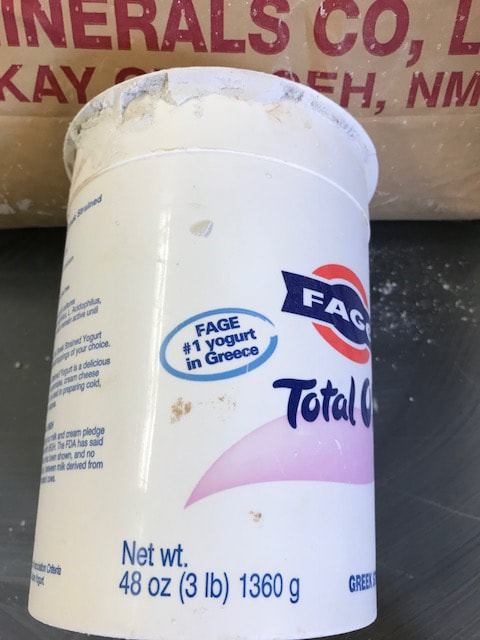
Amount of temper in 5 gal bucket
|
mixing in the temper
|
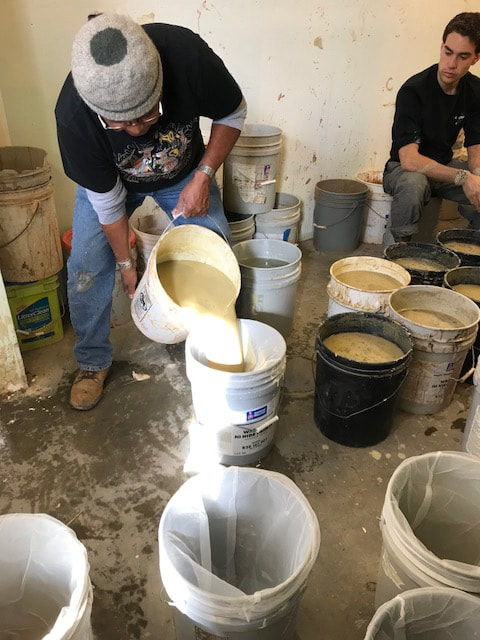
- Remove as much clear water as possible from the top of the clay.
- Pour off the rest into another bucket for recycling again.
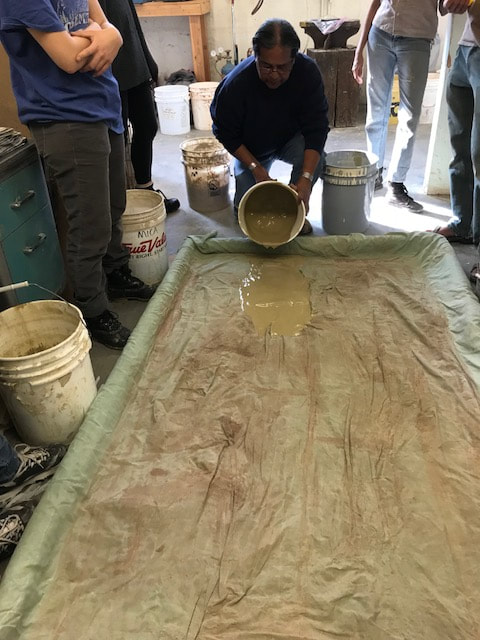
FEBRUARY 2 , 2018
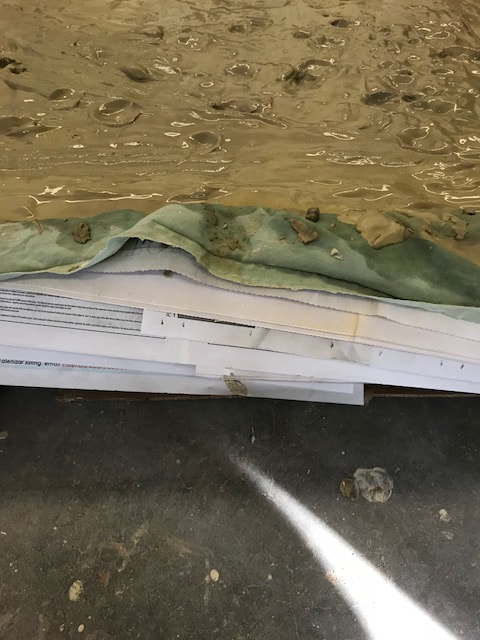
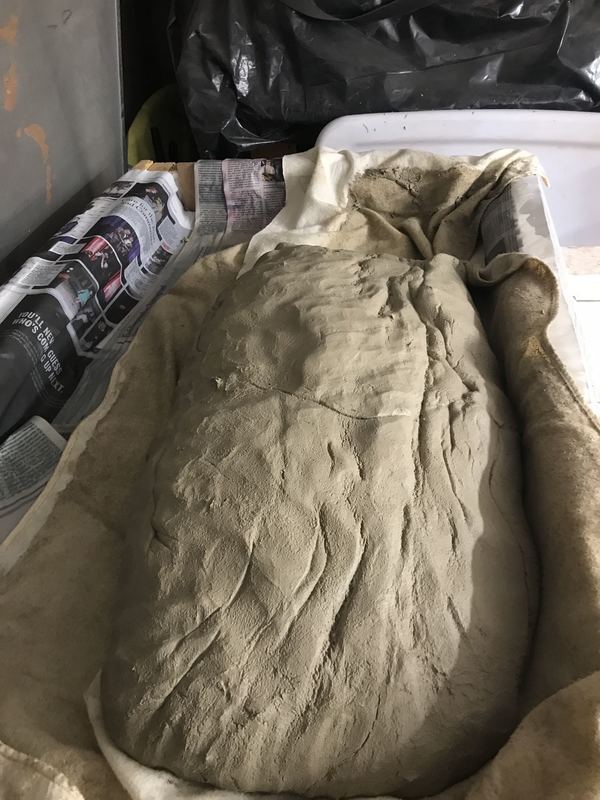
LAYING OUT/DRYING
- Pepare the drying bed.
- A large wooden frame (4" deep). Laid on cardboard.
- Line with many sheets of overlapping newspaper. Up over the edges and into the seams of the tray.
- Layer on top with a large cotton sheet, tucked under the sides of the bed.
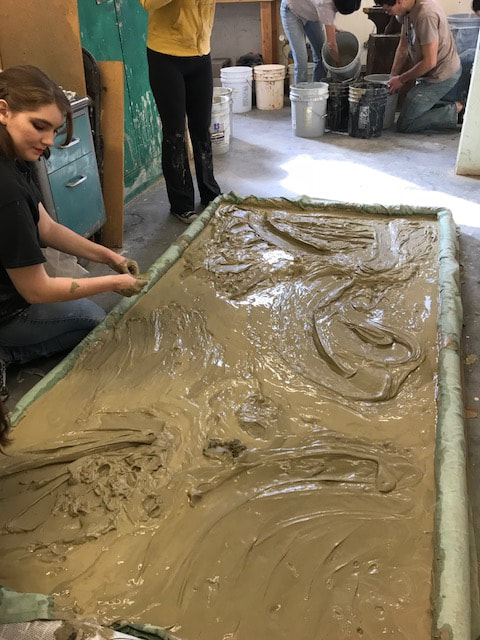
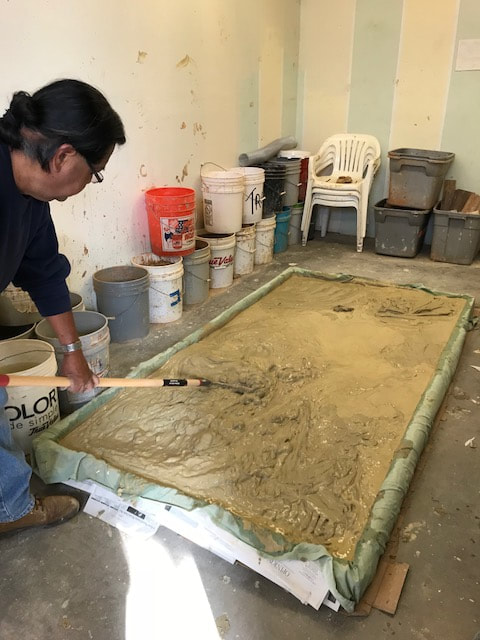
- Pour clay onto sheet and rake with back of a rake to level out and even out the differing consistencies.
|
|
|
|
|
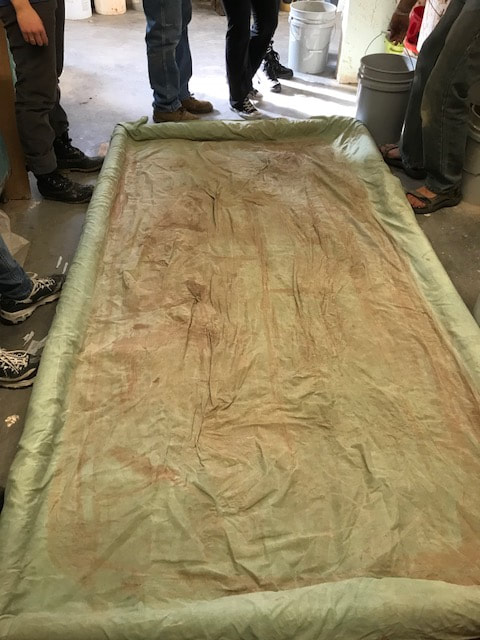
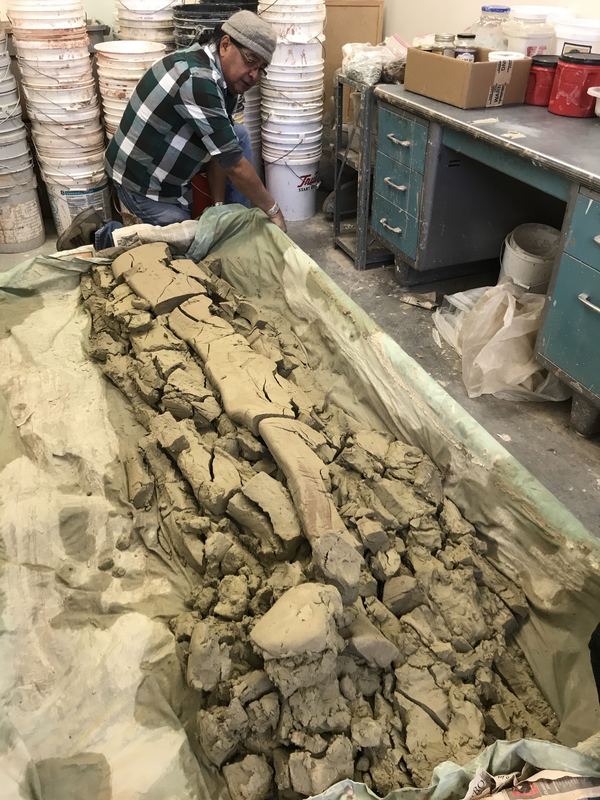
- Once cracks begin to appear through the clay, use the sheet to roll the sides over to the middle, to make a sausage.
- If surface of clay seems to dry to quickly, sprinkle with water from a sponge and cover with damp cloths.
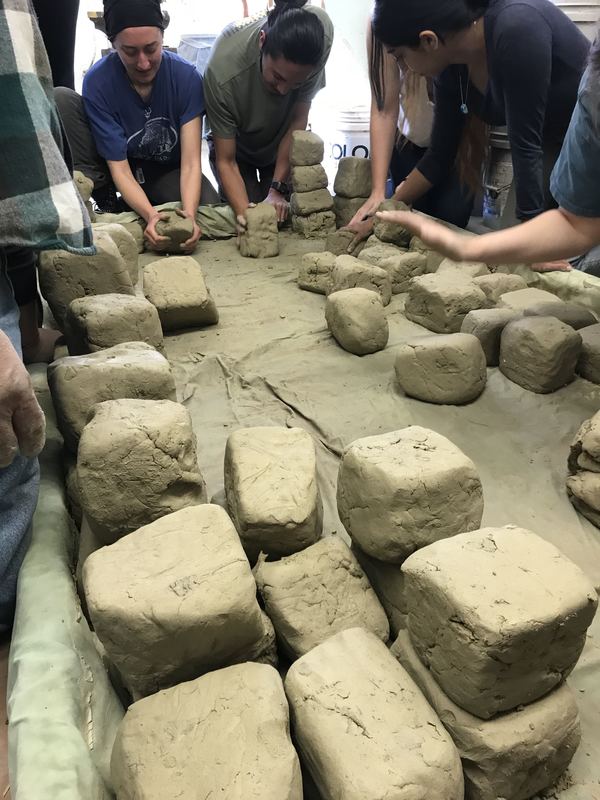
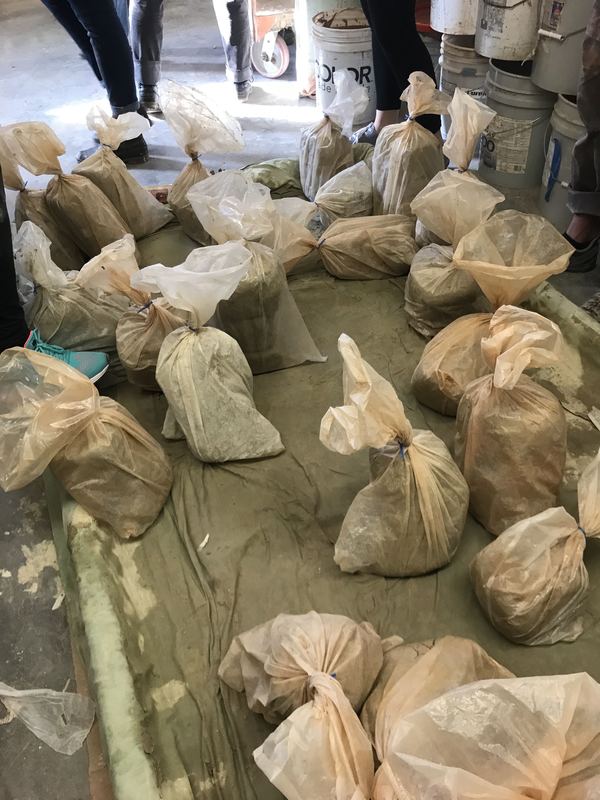
- Cut into usable sizes, form into cubes and pack into (reused) plastic bags.
|
|
|

|
|
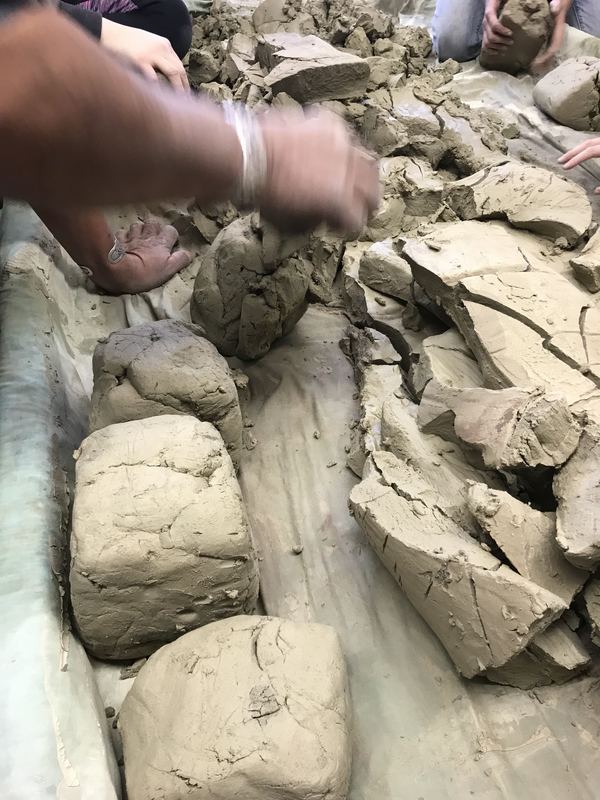
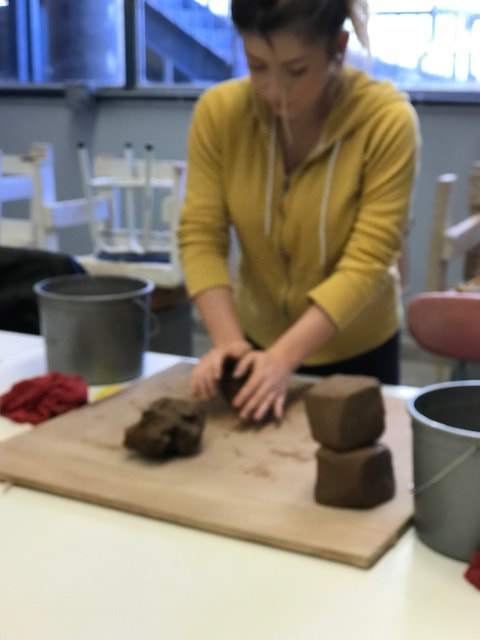
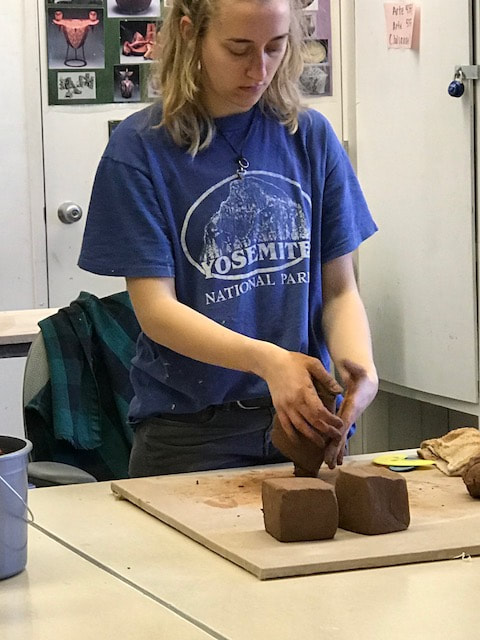
WEDGING
- Primary reasons to wedge clay:
- Remove air pockets
- Align clay particles - plate like molecules, so they overlap and adhere.
- Break clay into manageable chunks.
- Stand up, one foot forward and work from the shoulders using both hands.
- Push clay away from you with heel of hand and then roll it back in on itself.
- Approx 50 times per lump. Eventually a cone shape (or rams head) forms.
- Turn clay 90 degrees and repeat.
- Shape into a cube on table surface.
- Store clay to one side in a plastic bag. Or if using, cover with a damp cloth.
|
|
|
|
POt buildingTOOLS FOR POT BUILDING
|
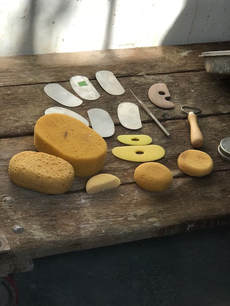
|
PINCH POTS - With Mica Clay
- Take a small quantity of clay and form it into a ball by smacking it backwards and forwards in each hand, while rotating.
- Push thumb into the center, about 3/4 the way down the ball.
- Rotate pot in hand, while squeezing with thumb on inside and fingers on the outside.
- Work methodically, starting at the lowest point in the pot, do a complete circuit. (Marking the start and stop point on the outside helps).
- Move thumb up and do another round.
- Repeat until top of the pot.
- Repeat whole process until desired pot thickness is achieved (1/4 inch)
- This process ensures a uniform wall thickness.
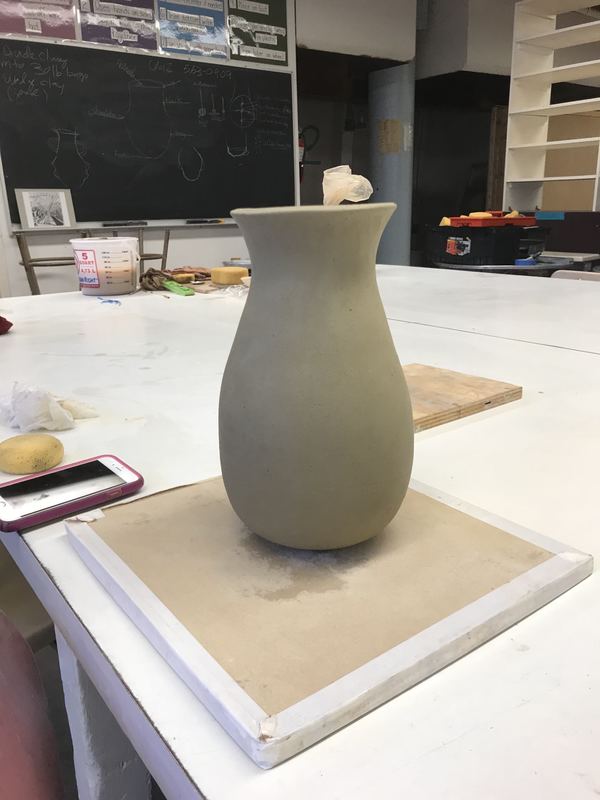
- Once desired form has been achieved, it can be manipulated /shaped for different functions. E.G
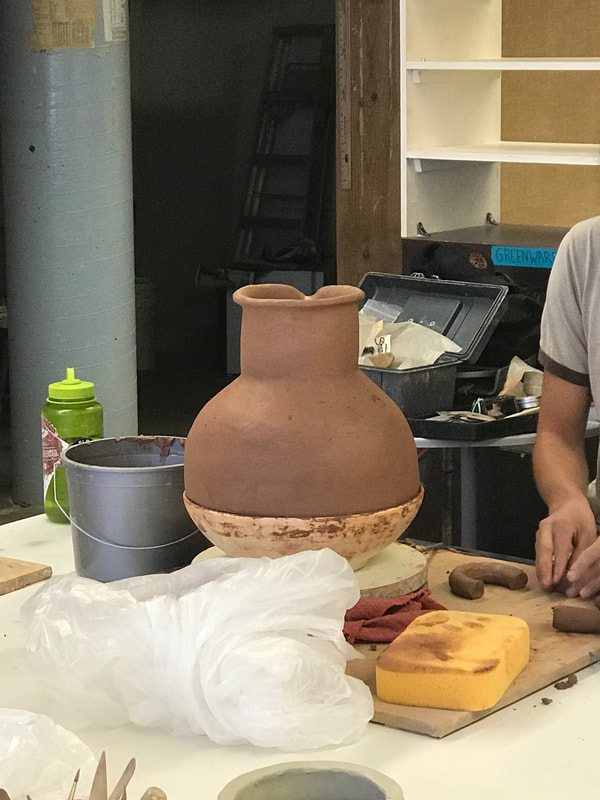
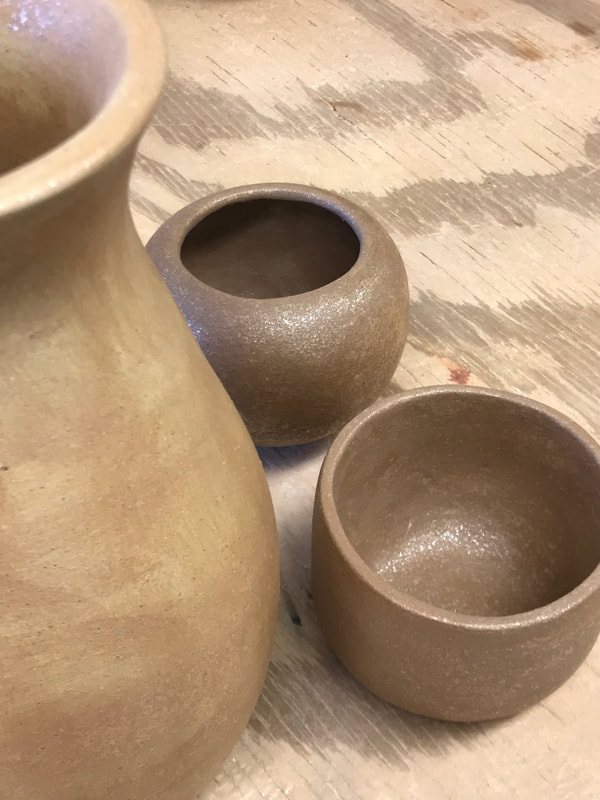
- Closed in by repeated 'pressing' in a circular motion eventually making a sealed air bubble. Open up again with needle tool to form a necked vessel or a seed pot. (used for seed storage).
- Adding handle - scored and slipped; coiled around joint for strength; supported by plug of clay.
- Forming a pouring spout.
- Smooth inside from bottom to top. Outside is smoothed last.
- Leave to dry slowly, covered by plastic bag (with hole in) on drying shelf.
|
|
|
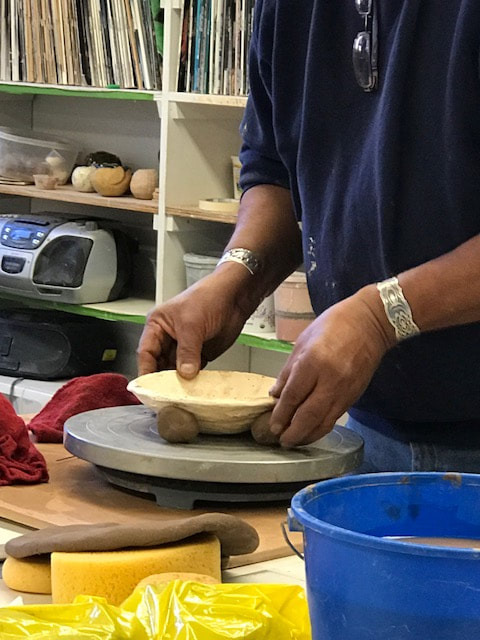
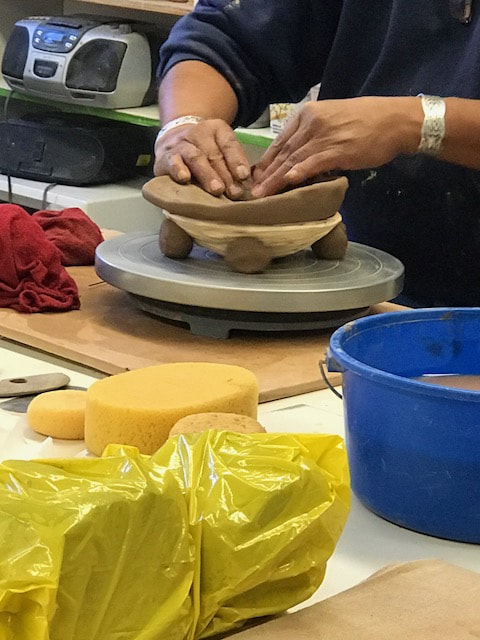
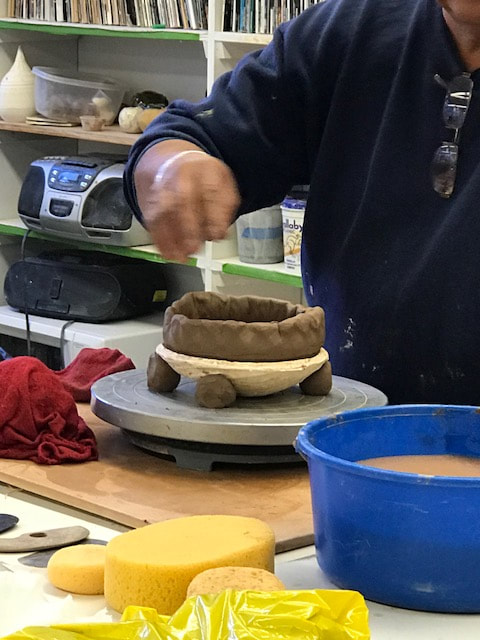
COILING - USING A PUKI
- Form clay into a ball as with pinch pot.
- Using palm of one hand and ball of the other, turn clay to create a patty.
- Slap (clap) at top edge of patty, continuously rotating, to create a flat, evenly thick disc.
- Make sure disc is at least 1" greater diameter than Puki.
|

|
|
|
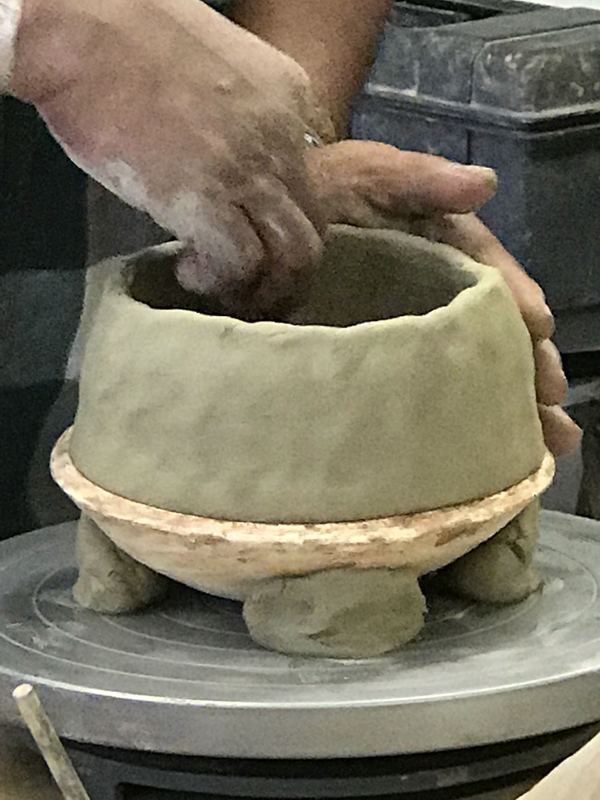
- Center and level a Puki on a banding wheel, and support it with 4 balls of clay - pressing in, but retaining round form.
- Center clay plate equally over the Puki, lifting up sides vertically. Do not press into base of form.
- Gently ease side closest to you down into the form, at the same time, releasing the further edge away from the form to allow air to escape.
- The sides of the walls overlap, because of decreased circumference, and vertical alignment.
- Blend and smooth the side walls, encouraging a cylinder to form.
|
|
|
|
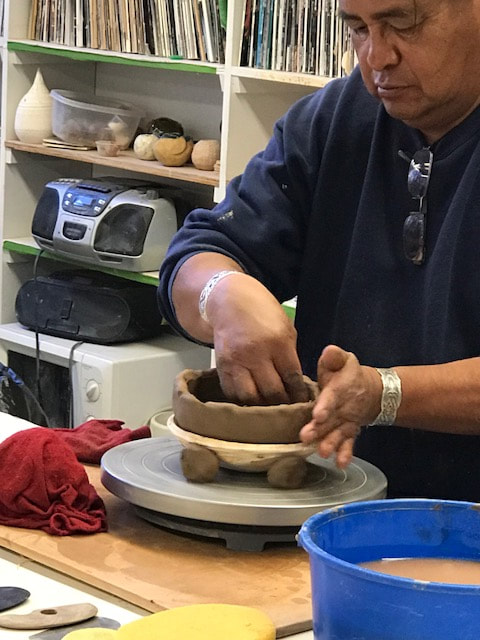
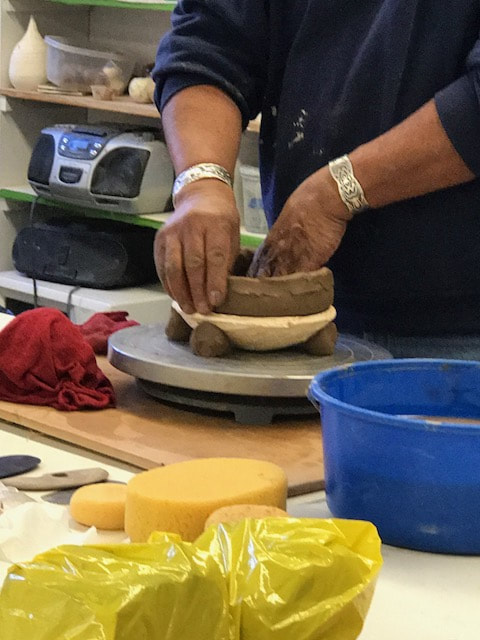
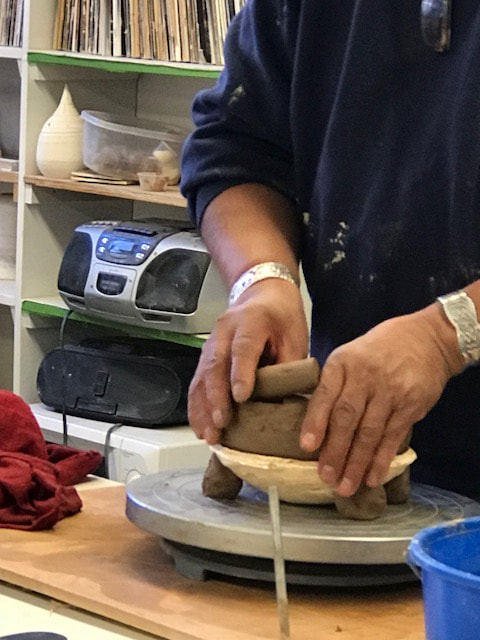
ADDING COILS
- Create a sausage coil, rolling between upper palm of hand, (not fingers as its will be uneven ) allowing it to drop down.
- Slice off and discard hollow ends of coil.
- Check length of coil against diameter of pot.
- Attach/ push to inside rim of pot - 1/2 in and half out
- Butt join ends of coil.

|
|
|
|
- Blend in coil to pot sides
- Inside: blending down.
- Outside: make a round blending up.
|
|
|
|
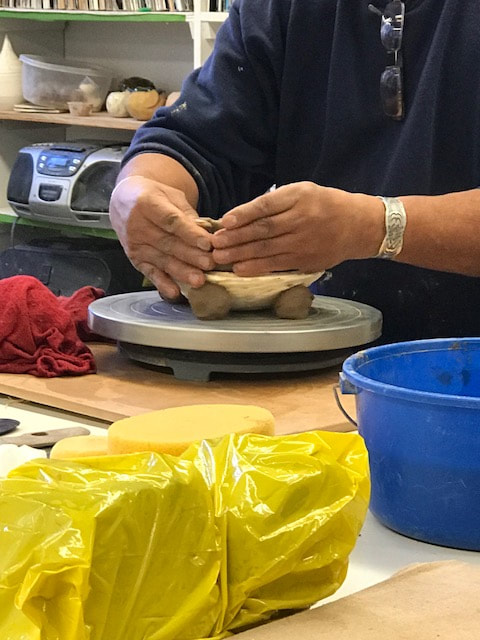
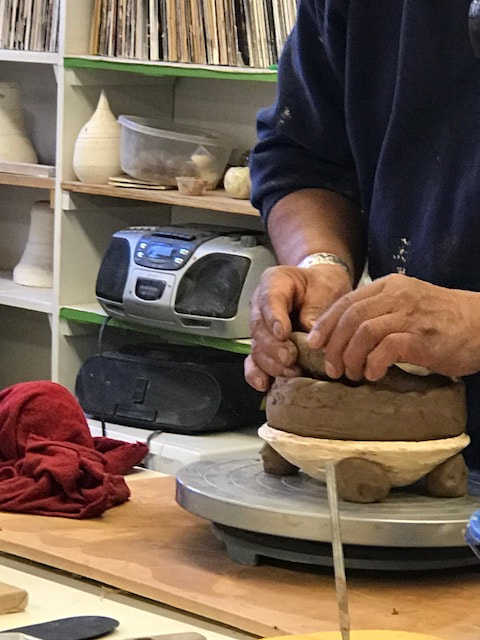
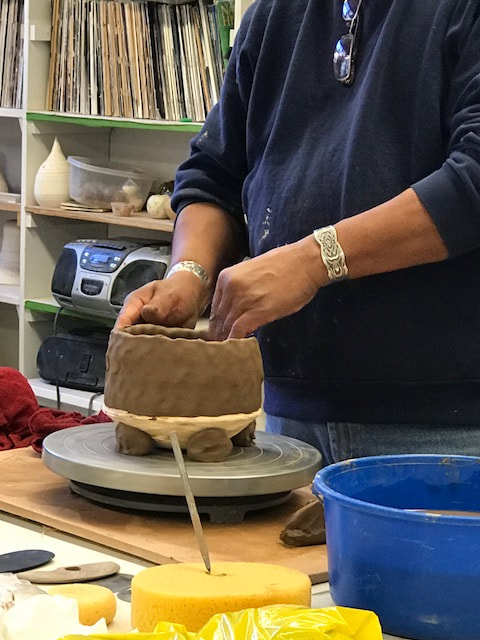
- Pinch all the way around again, as at the thumb pot, blending to extend cylinder upward.
- Smooth outside of pot with metal and plastic ribs
- Blend inside of pot with serrated metal rib.
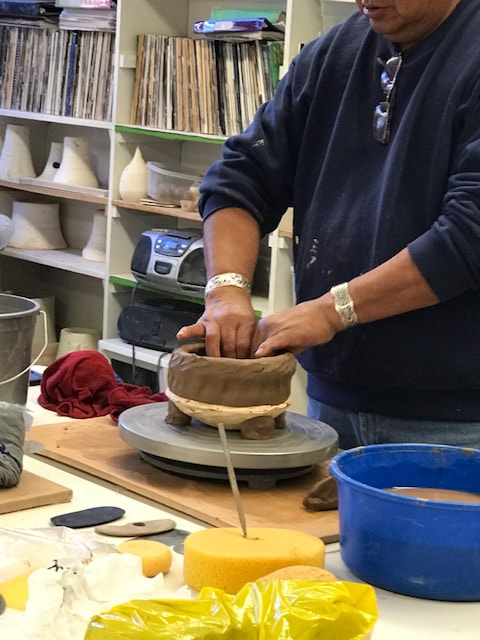
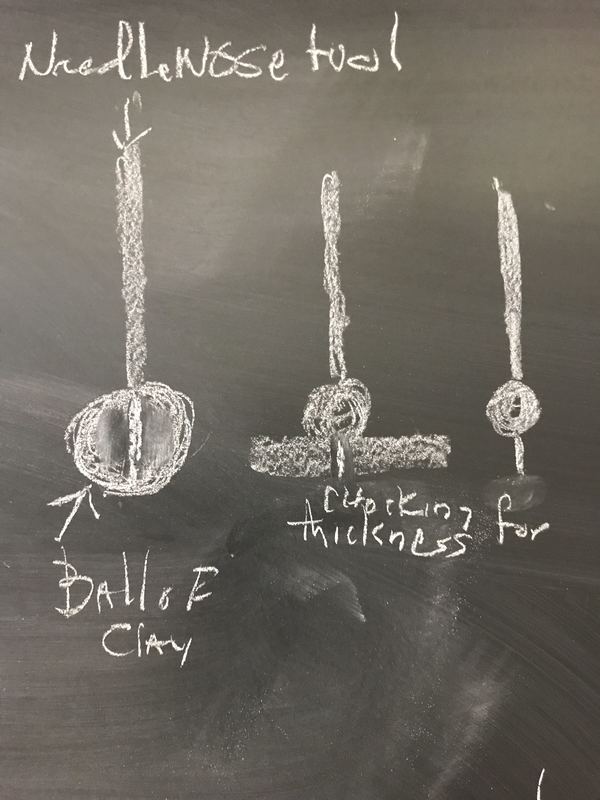
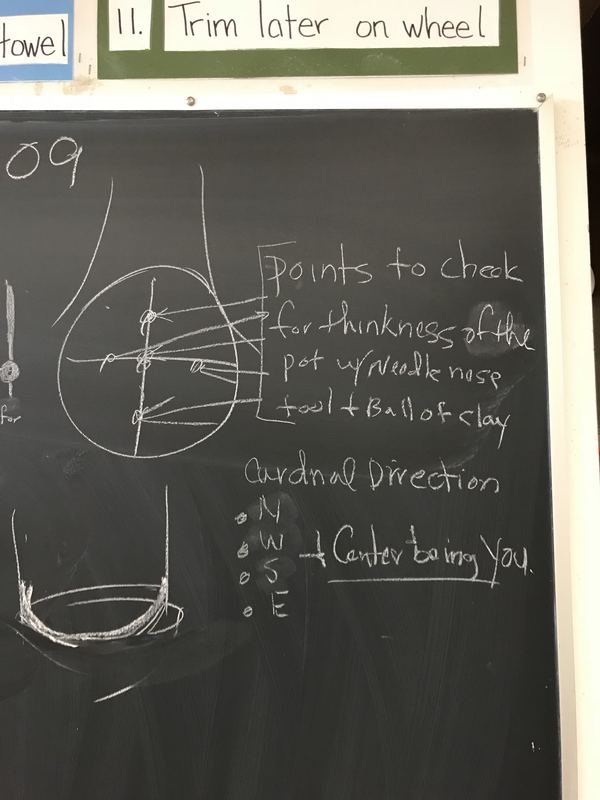
- Check thickness of base of pot at 4 cardinal points and center using a needle tool and ball of clay.
- (Score and patch pieces of clay to add thickness, if necessary).
- Repeat with more coils as required.
|
|
|
|
|
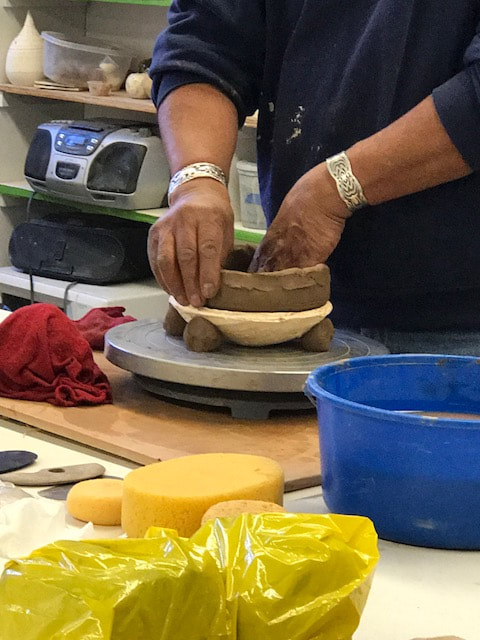
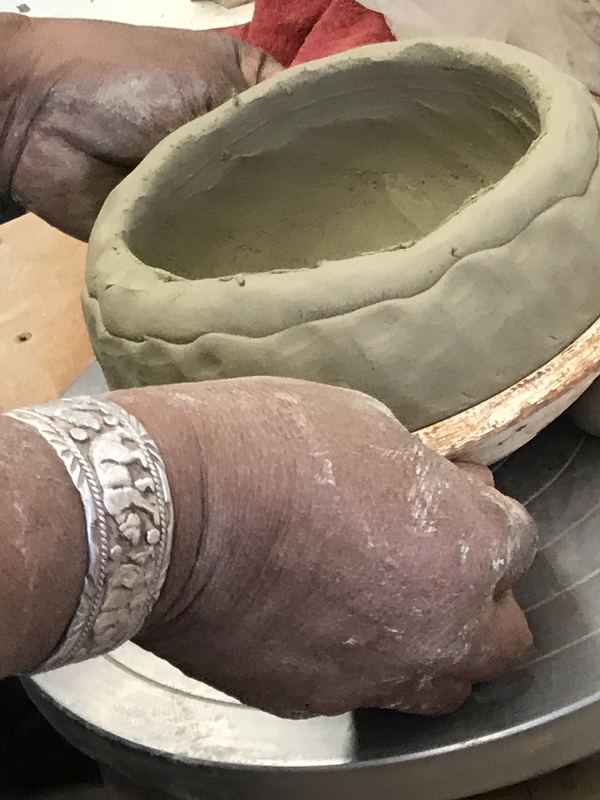
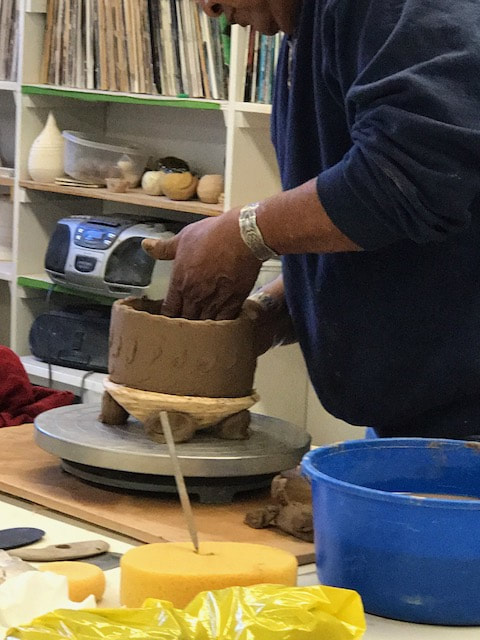
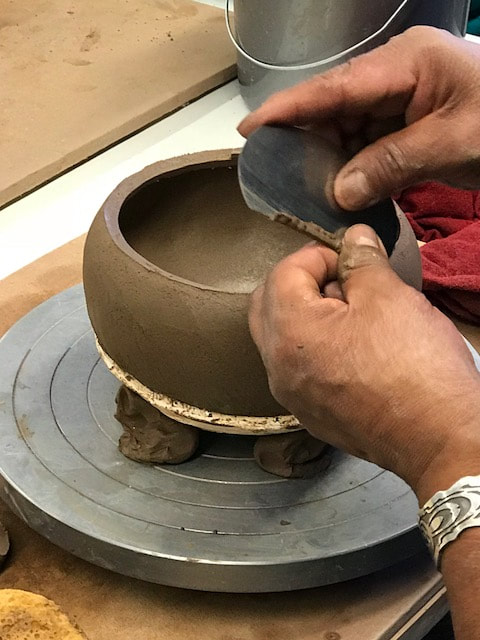
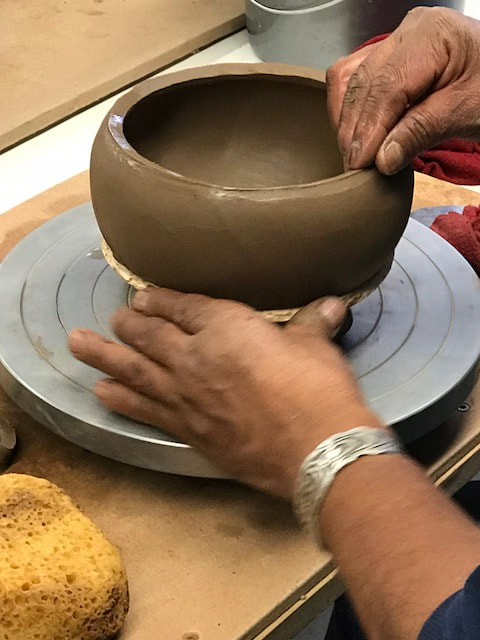
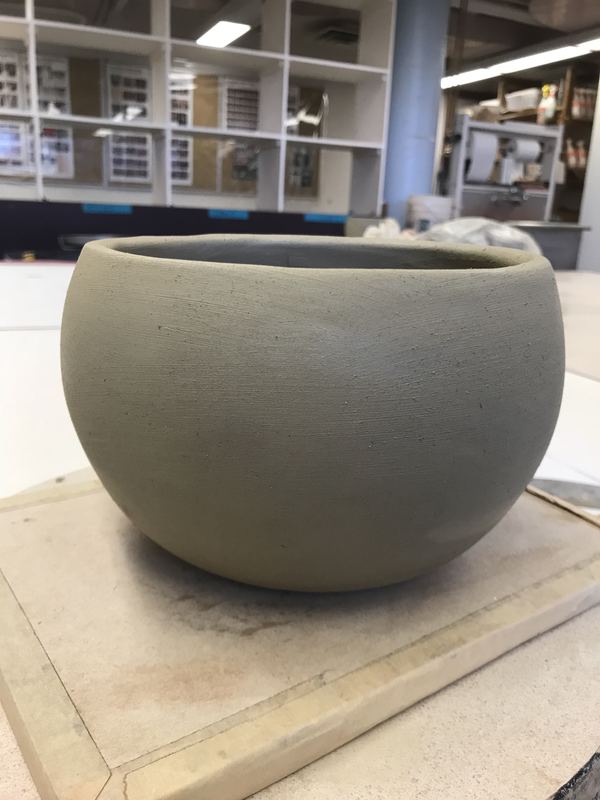
- Start moulding shape of bowl.
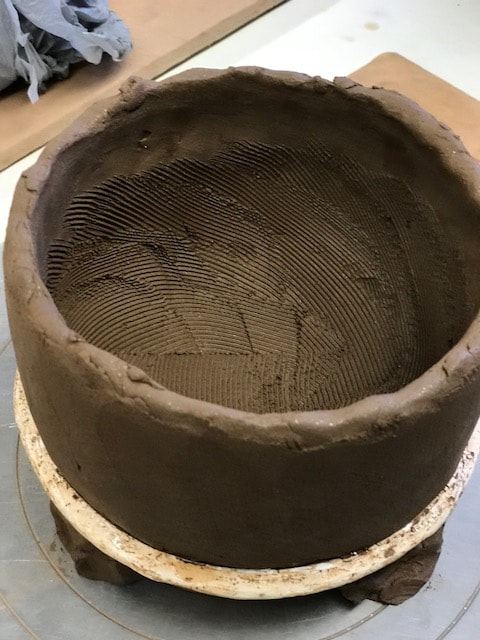
- Scrape interior with serrated metal rib to get even thickness of walls.
- Blend angle at joint of coil and form
- Use smooth rib to shape around top of form to release from form and remove sharp edge - see air between puki and clay
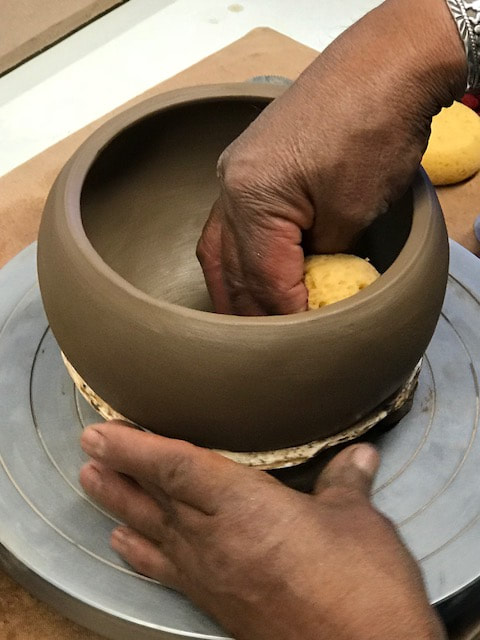
- Push out from inside to 'bowl' pot and smooth exterior surface
|
|
|
|
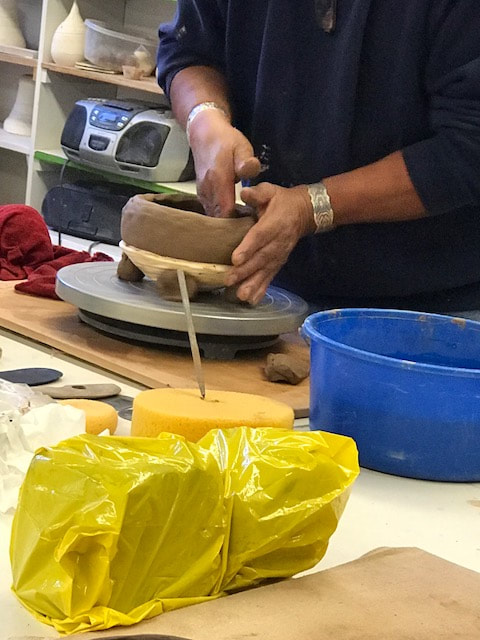
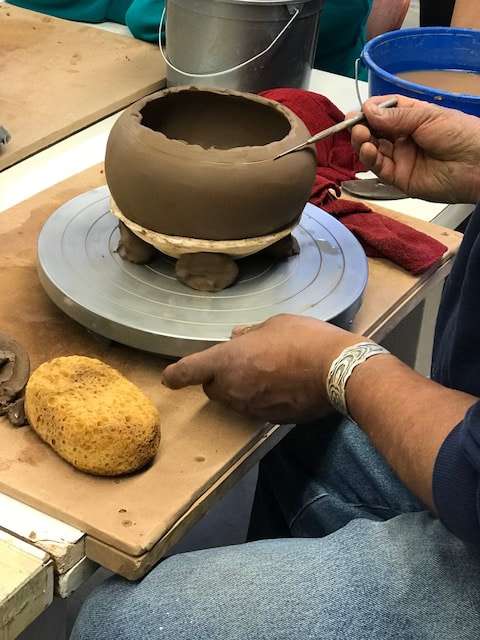
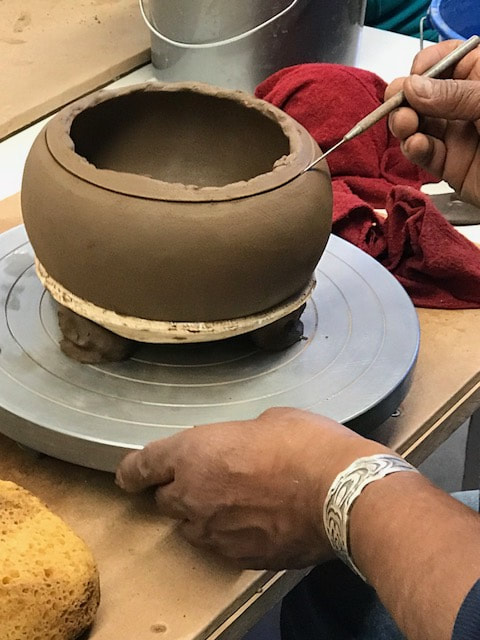
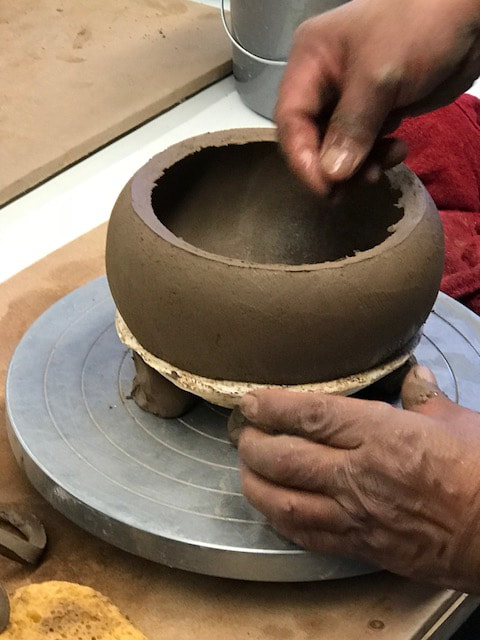
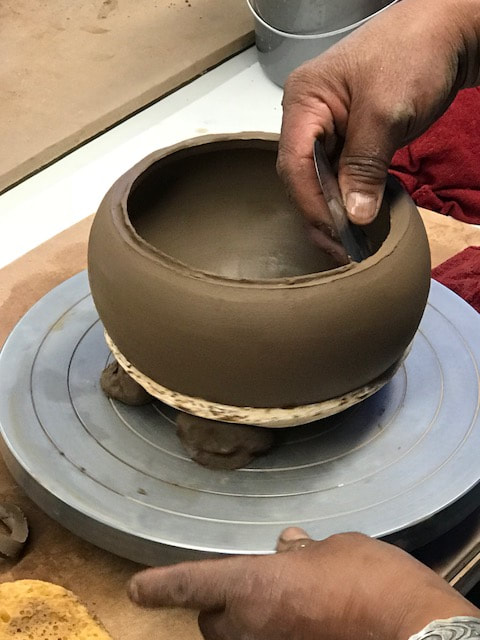
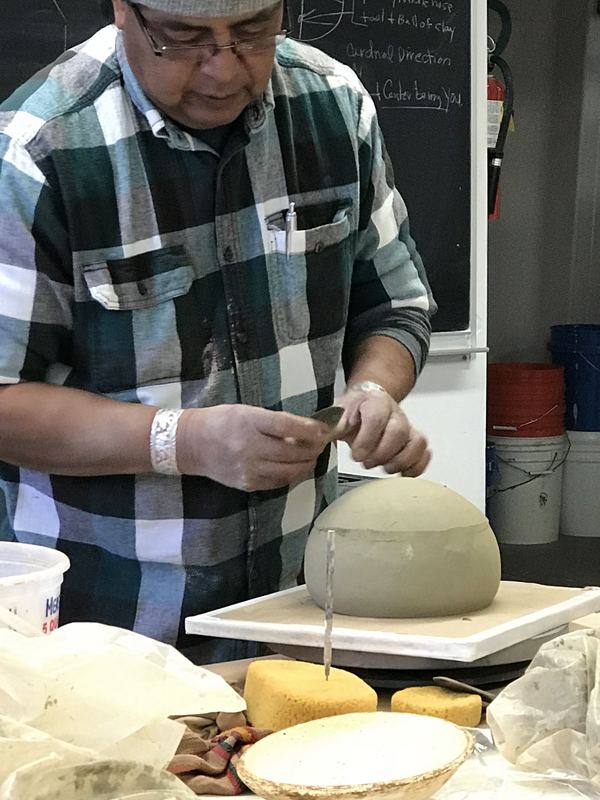
FINISHING TOP
- Brace and level a needle tool against exterior of pot - at lowest point of rim
- Turn banding wheel to score clay
- Repeat, penetrating deeper with needle.
- Discard cut away rim.
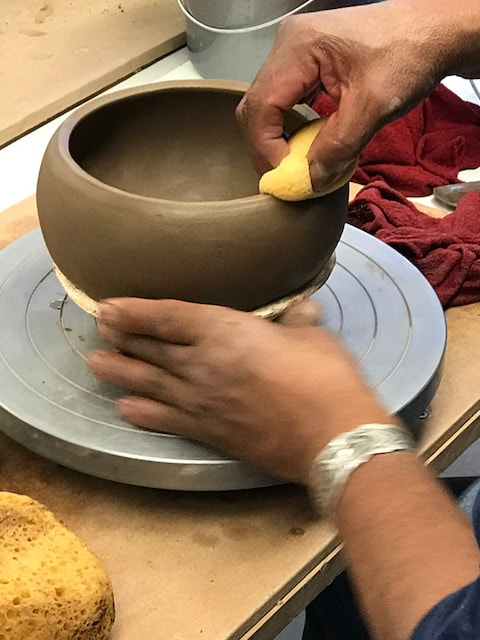
- Clean interior edge with metal rib - 2 times
- Smooth edge with wet fingers
- Smooth again with damp sponge
- Smooth out interior with damp sponge.
- Leave in form to dry. under plastic.
|
|
|
|
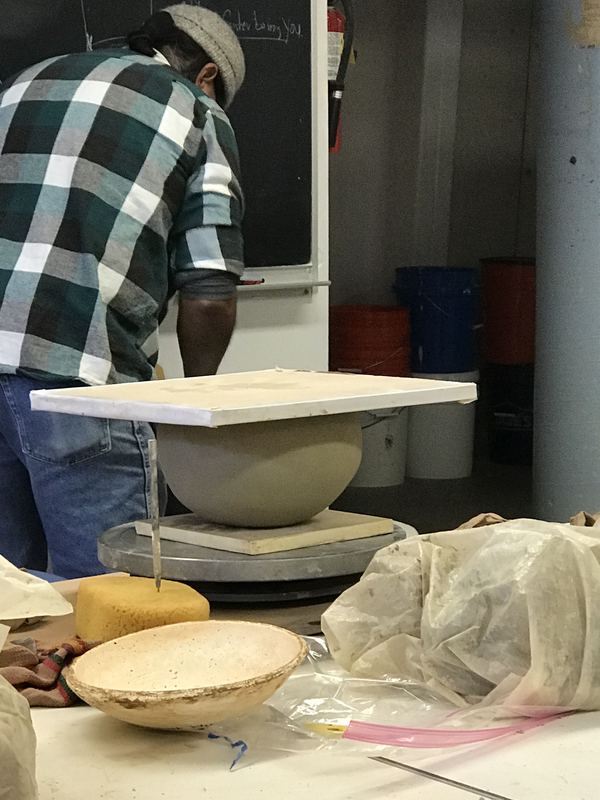
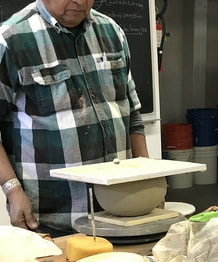
FINISHING OUTSIDE
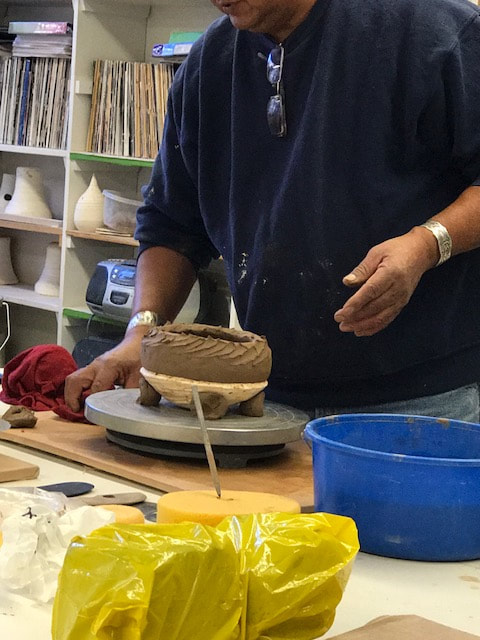
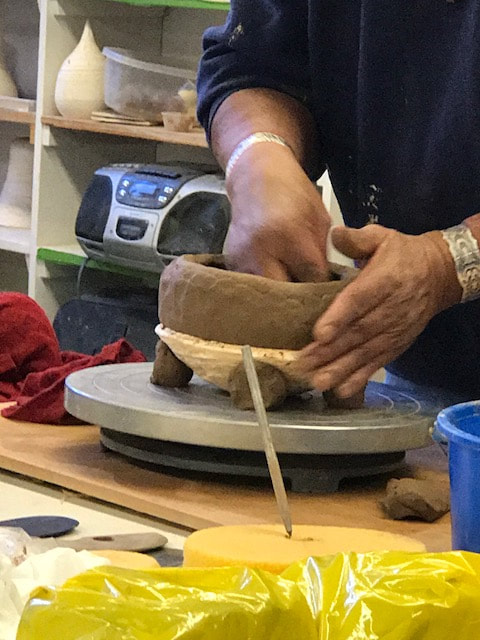
- When the pot is leather hard, place a board over the mouth of the pot, turning it upside down so the puki comes away.
- Place on a banding wheel on board, upside down.
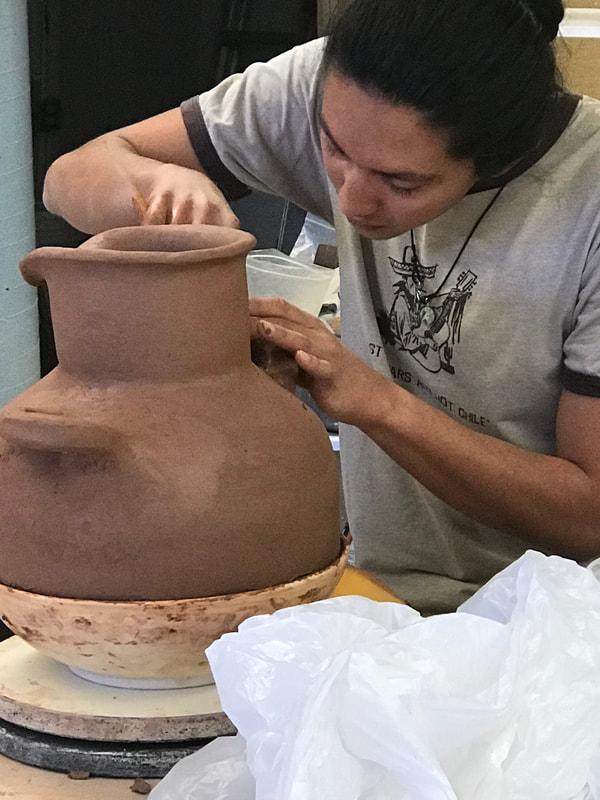
- Finish the outside of the pot. Smooth out the joint between the puki area and clipped area with a rib.
- Create a smooth surface with various tools; serrated edge for large reshaping, smooth metal rib, rubber rib and a damp sponge.
- Using a second bat turn the pot the right way up on the banding wheel.
- Use the bat and a marble to find the level place on the pot - pushing firmly on the bat to make a flat base to the pot.
|

|
|
|
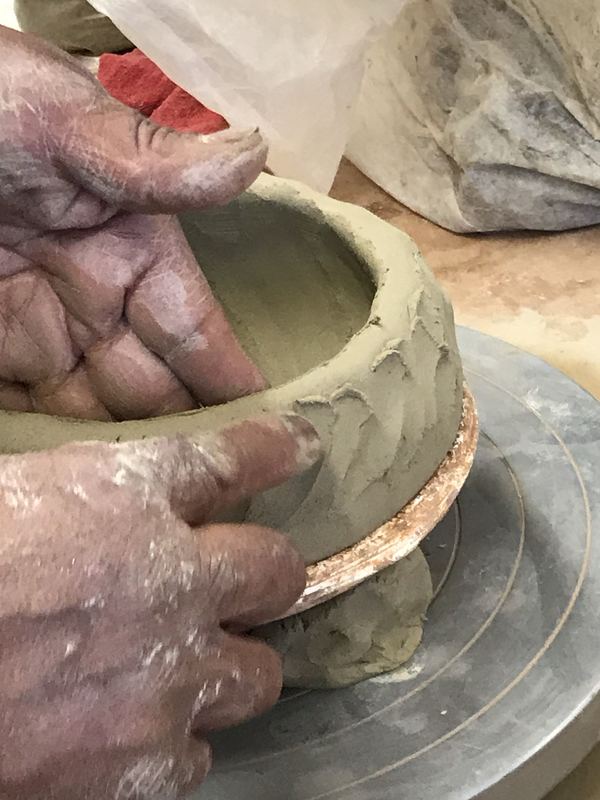
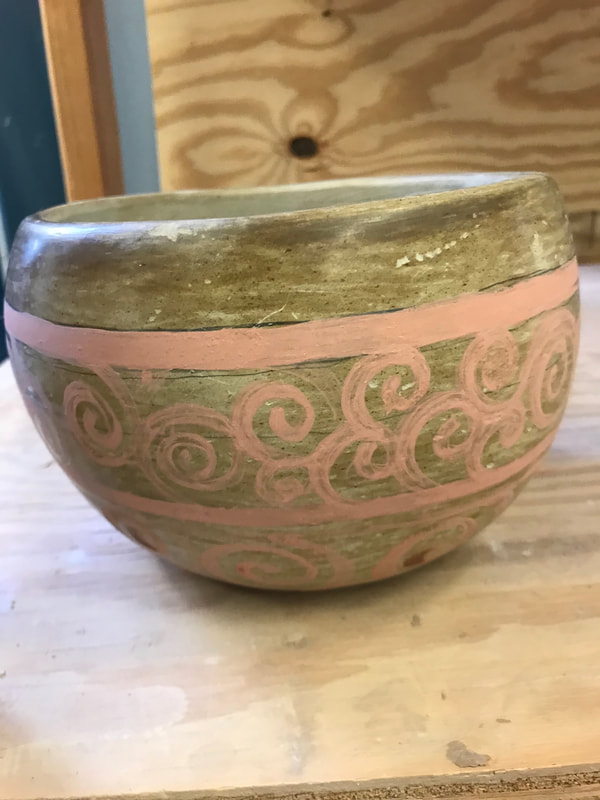
- At this (leather hard) stage you can begin decorating of the pot by inscribing patterns
- Also add handles or spouts etc.- (wet) Handles are added and supported in place by coils of clay - later blended into the body and handle.
- Leave the pot to dry under loose plastic.
|
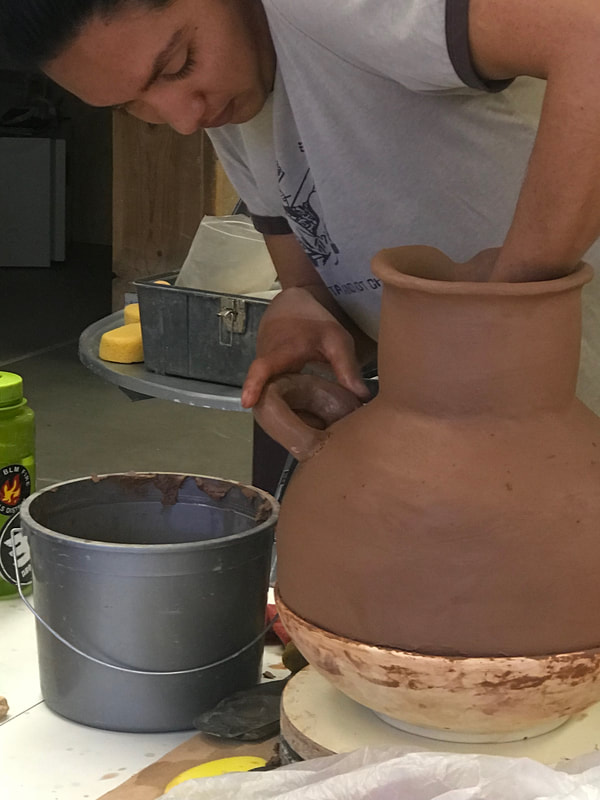
Adding handles
|
|
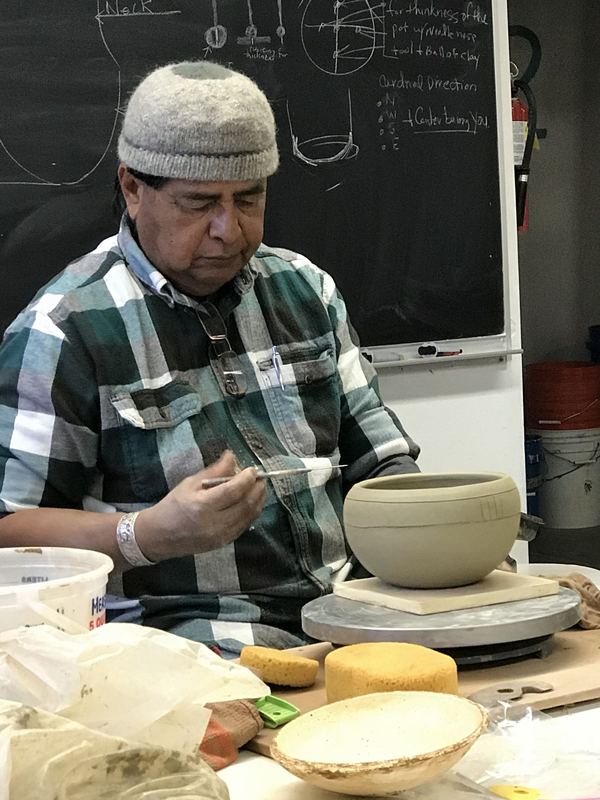
Inscribing with needle tool
|

Carving out clay patterns
|
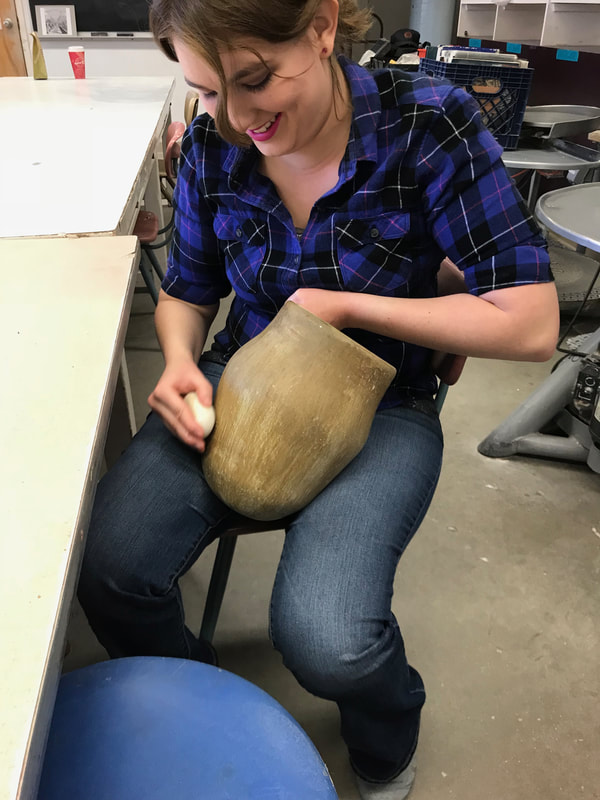
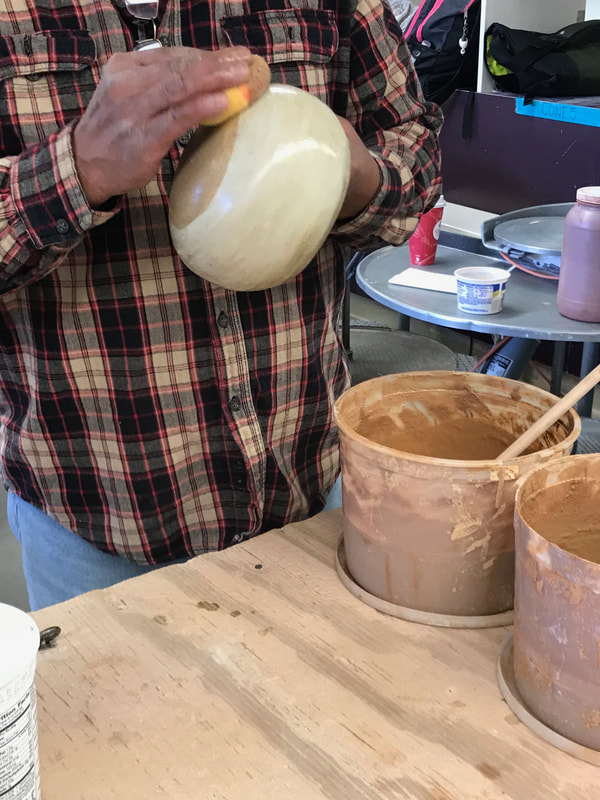
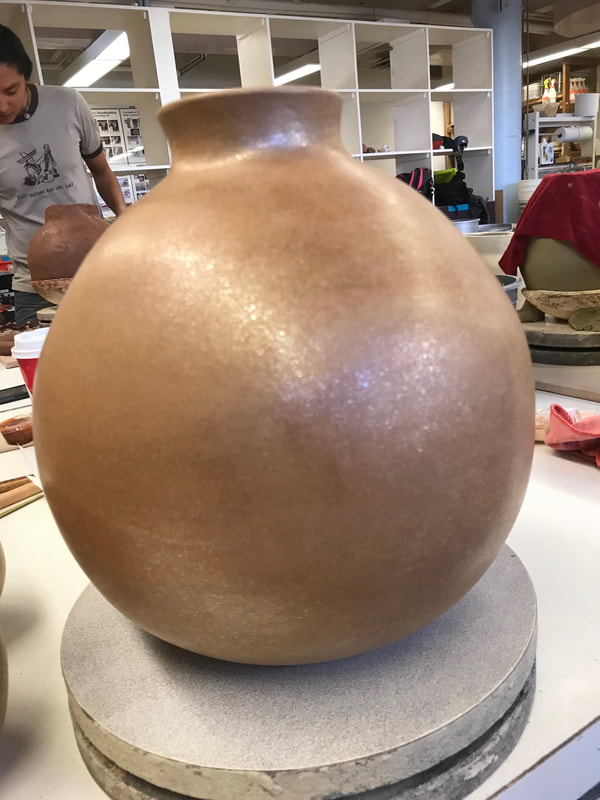
SANDING AND POLISHING
- When the pot is bone dry, sand the pot in a well ventilated area, using a face mask.
- Wipe out pot with damp sponge and leave to dry
- Apply a thin layer of vegetable oil to the pot surface and allow to dry.
- Polish the pot with a smooth polishing stone. working systematically over the entire surface of the pot.
- If there is a delay in finishing the polish, more oil will have to be applied.
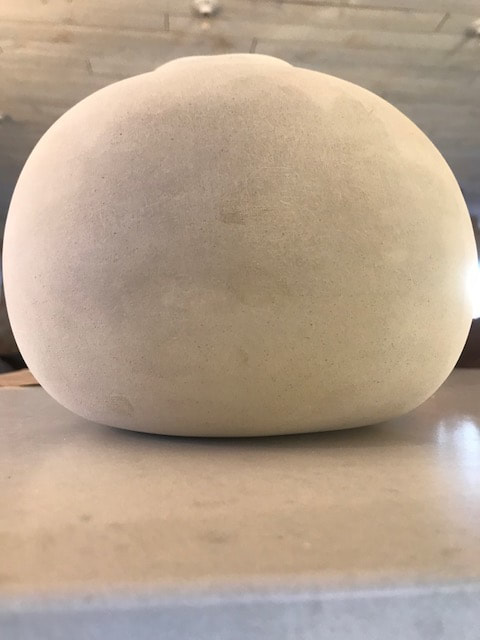
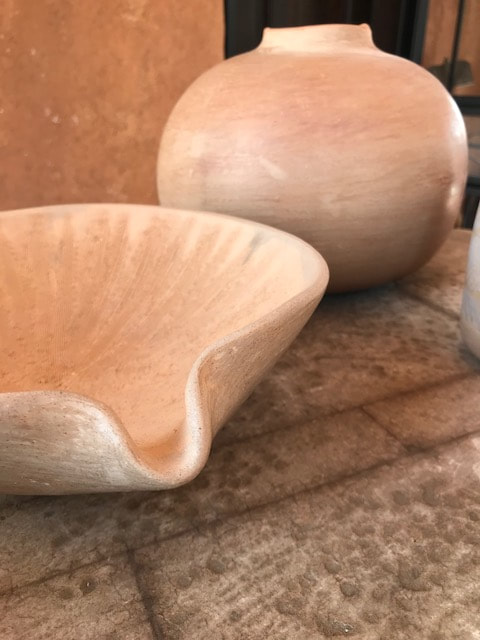
Sanded, bone dry Madrid clay
|
Sanded bone dry Madrid clay
|
Stone polishing
|

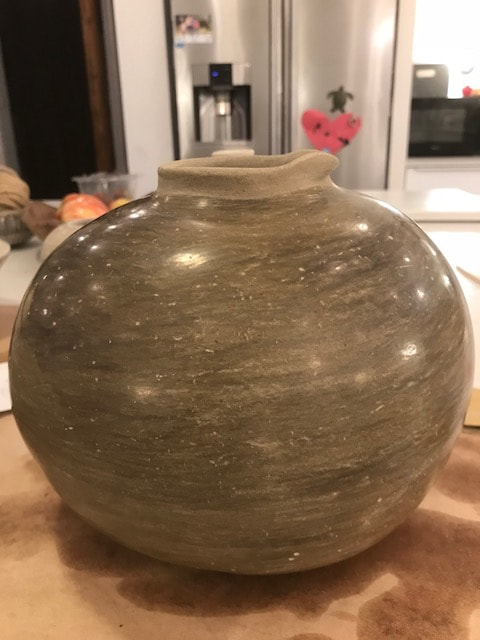
Stone polished bone dry Madrid clay
|
MIca slip on Madrid clay
|
decorating:
DECORATING:
- There are various traditional methods of painted decoration using slips and pigments.
- The same techniques can have very different finished effects, depending upon how they are fired: either in oxidation or reduction *see below).
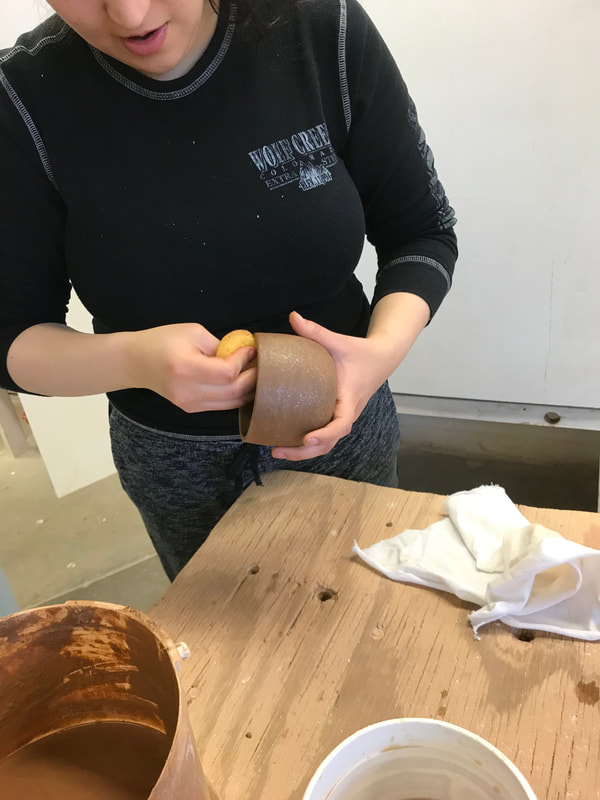
MICA SLIP
- Micaceous slip can be applied to any clay surface.
- It will make the pot look like it is from mica clay but it will not become suitable for practical purposes, unless the base clay is micaceous.
- Start with a smooth pot, not necessarily polished.
- stir the Micaceous slip continuously
- dip a damp sponge into the slip and spread over the pot ( as if cleaning, not polishing) to deposit the glassing pieces on mica onto the surface.
- Wash out sponge, to remove grog if it becomes clogged. Repeat dip and coat - 2 coats are possible
- Allow to dry.
- Buff pot with a soft rag or a soft rag inside a layer of plastic wrap.
Stir the mica slip
|
Apply mica evenly
|
More coats can be added
|
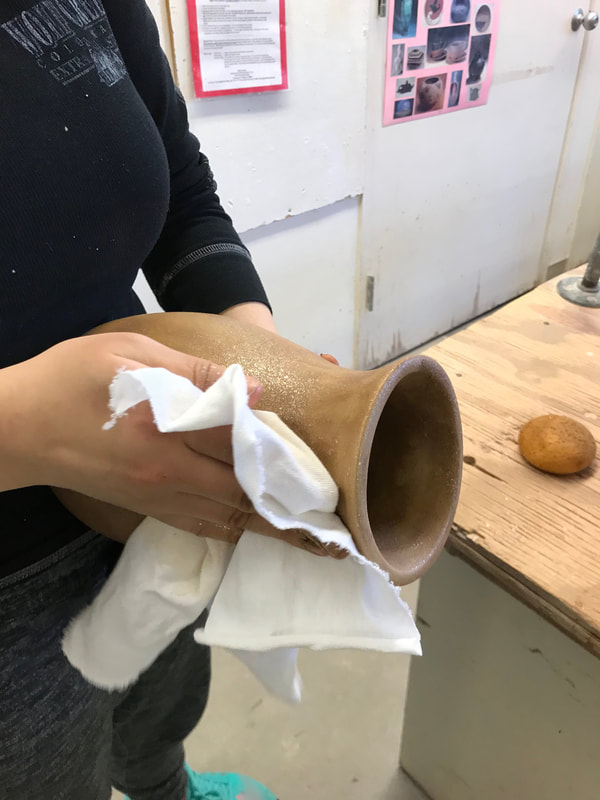
buff with soft cloth
|
Mica slipped pots on Madrid clay base
|
IN OXIDATION: Mica will fire to it natural red color with glitter effect.
IN REDUCTION: Mica will fire to a shiney black with glitter effect.
IN REDUCTION: Mica will fire to a shiney black with glitter effect.
MAKING A YUCCA PAINTBRUSH - see Pueblo Pottery - Materials 2018
MAKING SLIP - Also see Pueblo Pottery - Materiasl 2018
Clay paint called slip. Clay naturally dissolves in water, which is used in refining the clay body. Slip is made by taking a portion of the clay and mixing just enough water to create a paint-like consistency. Next, a selection of minerals or local plant material is added to the slip; this is what creates the different colors. The slip, or clay based paint, is then painted on a piece of pottery that has not yet been fired. Because the paint is made of the same material as the clay of the pottery piece, it easily adheres to the walls of the work. After the slip dries, it can only be safely removed by gently scraping it off.
Clay paint called slip. Clay naturally dissolves in water, which is used in refining the clay body. Slip is made by taking a portion of the clay and mixing just enough water to create a paint-like consistency. Next, a selection of minerals or local plant material is added to the slip; this is what creates the different colors. The slip, or clay based paint, is then painted on a piece of pottery that has not yet been fired. Because the paint is made of the same material as the clay of the pottery piece, it easily adheres to the walls of the work. After the slip dries, it can only be safely removed by gently scraping it off.
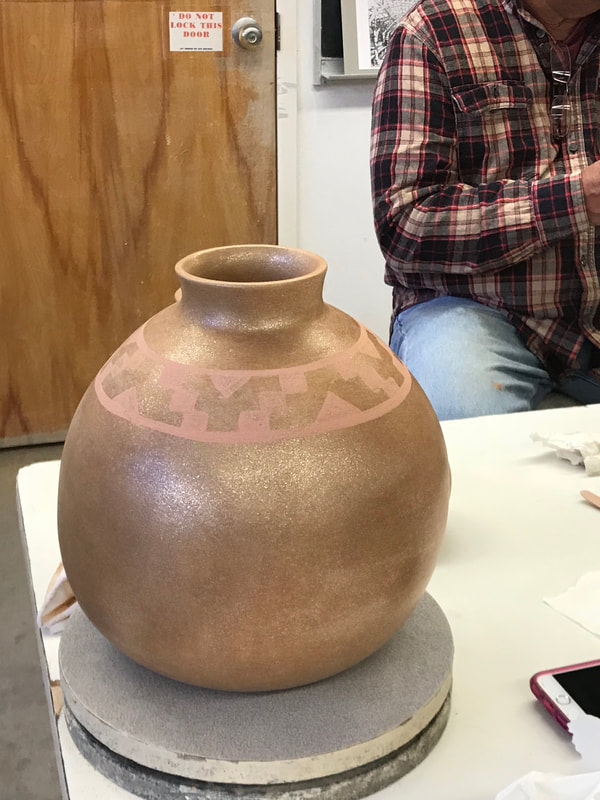
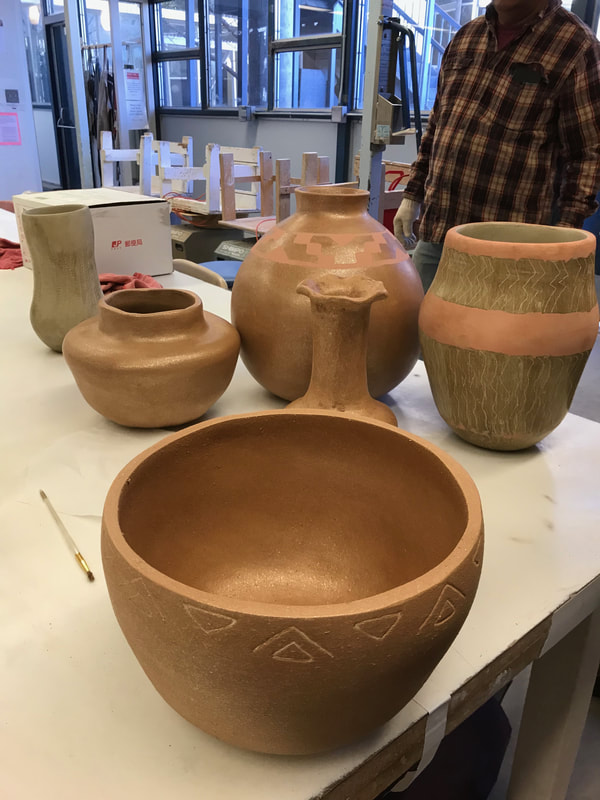
EARTH PIGMENTS
- Colored pigment/slip can be applied to the whole surface, or applied as a pattern to contrast with the base.
- Start with either a polished or sanded base. Note: Polished will fire to a polished finish.
- IN OXIDATION: Slip will fire to reveal it's true color
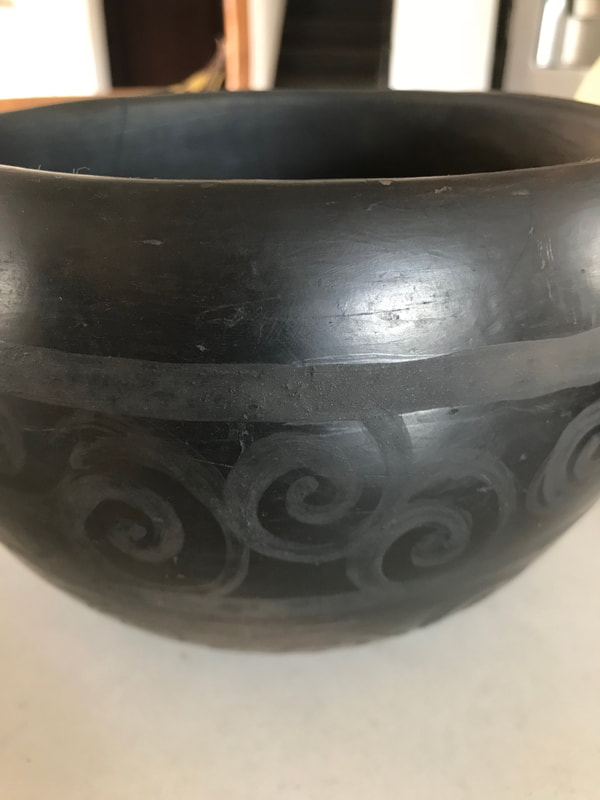
IN REDUCTION: Slip will fire to a matt black, contrasting with the shiny black polished background clay.
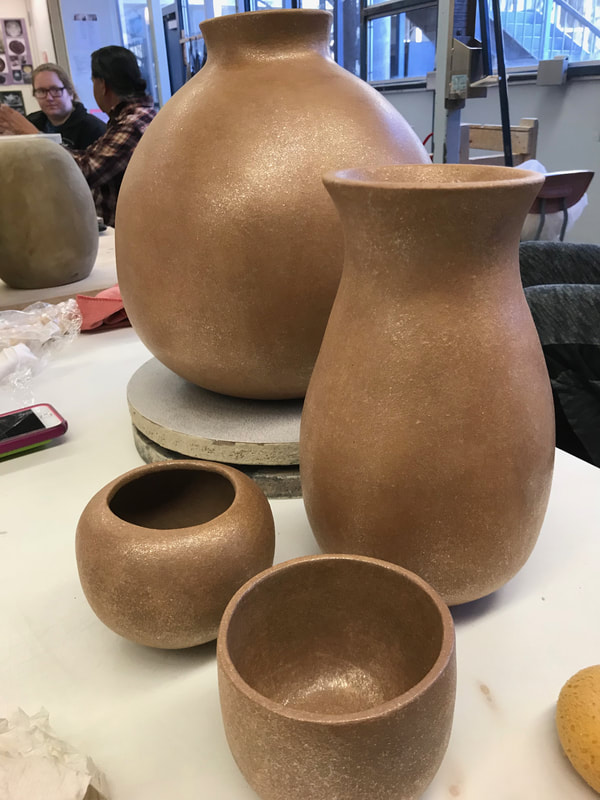
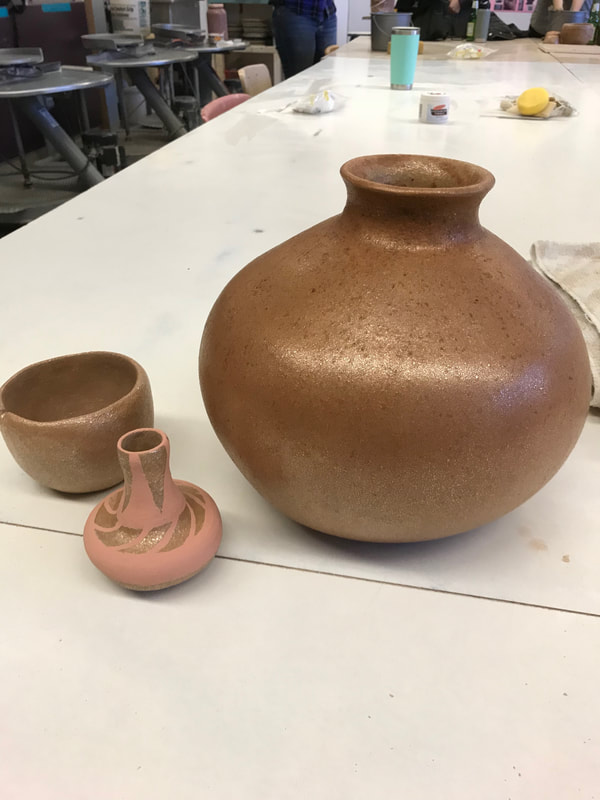
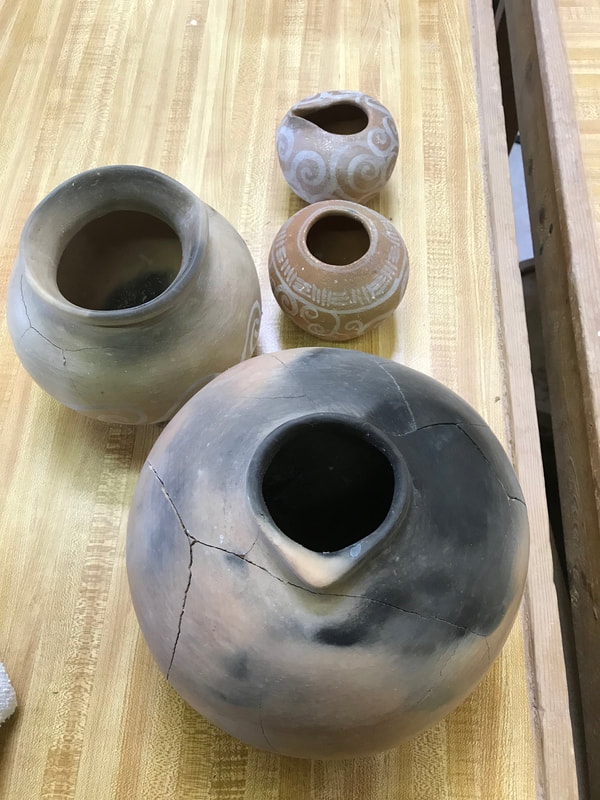
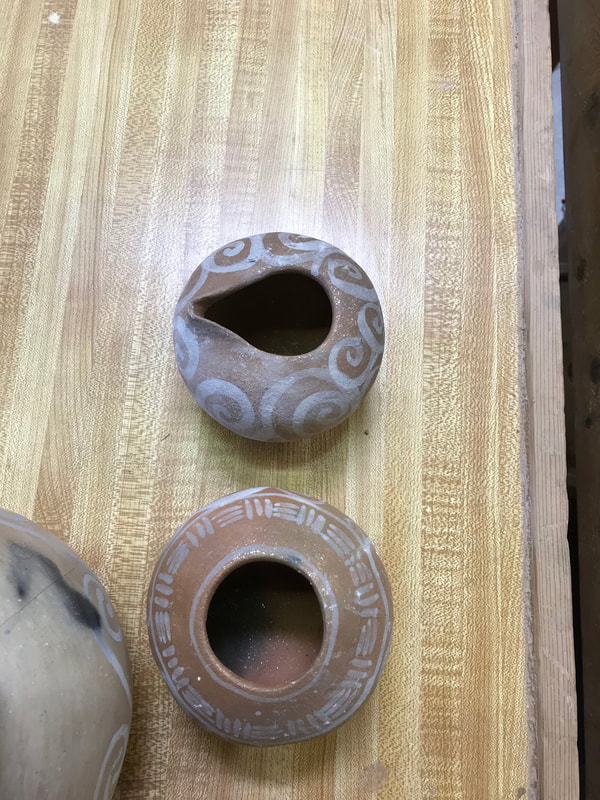
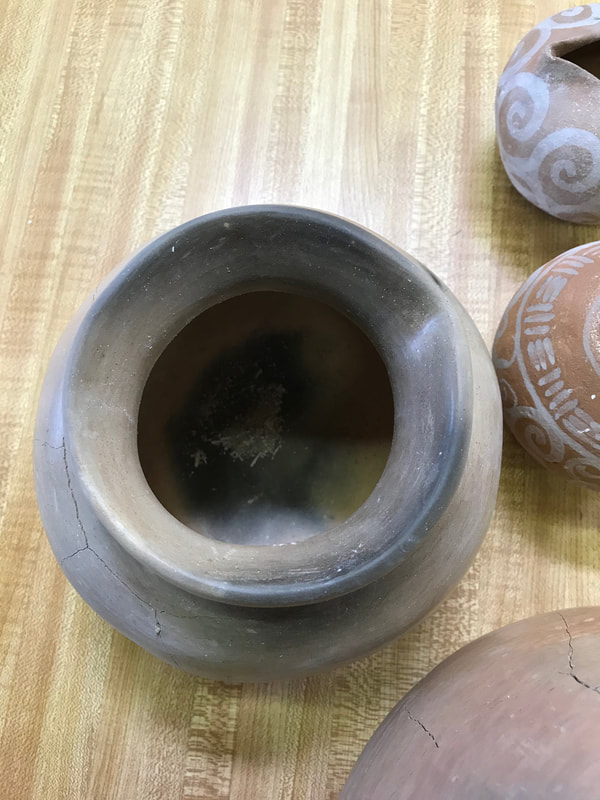
DECORATED POTS
Mica slip coat only
Highly polished mica slip on Madrid. To be fired in oxidation.
|
MIca slip coat with red slip patterns. To be fired in reduction.
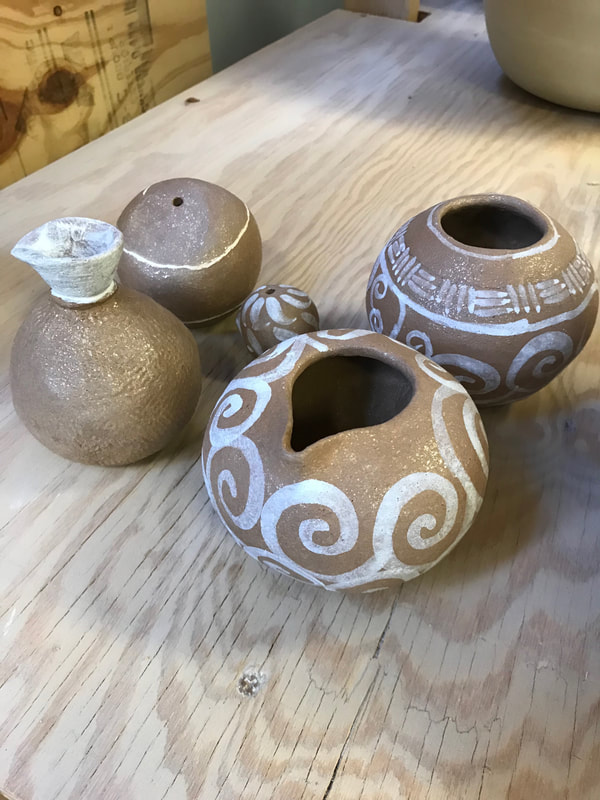
White slip patterns on mica clay. To be fired in oxidation
|
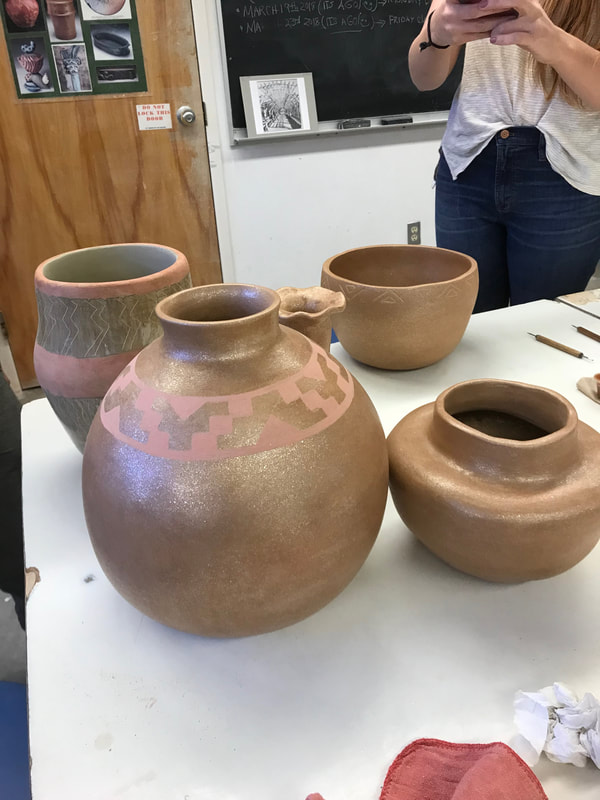
Red slip patterning on Polished Madrid clay. To be fired in reduction.
|
Incised pattern on mica sliped clay. Red slip patterning on polished Madrid clay (back right).
Incised decoration interior and allied slip pattering on polished Madrid clay. To be fired in
|
firing:
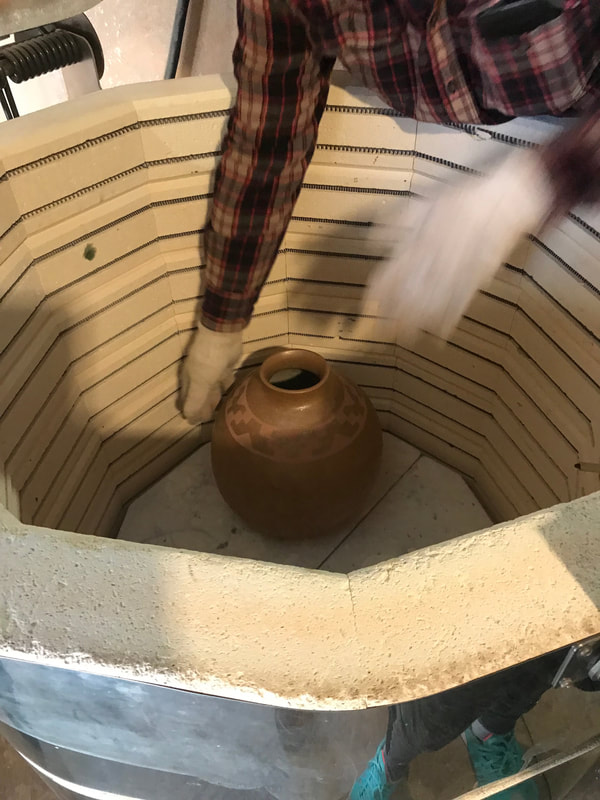
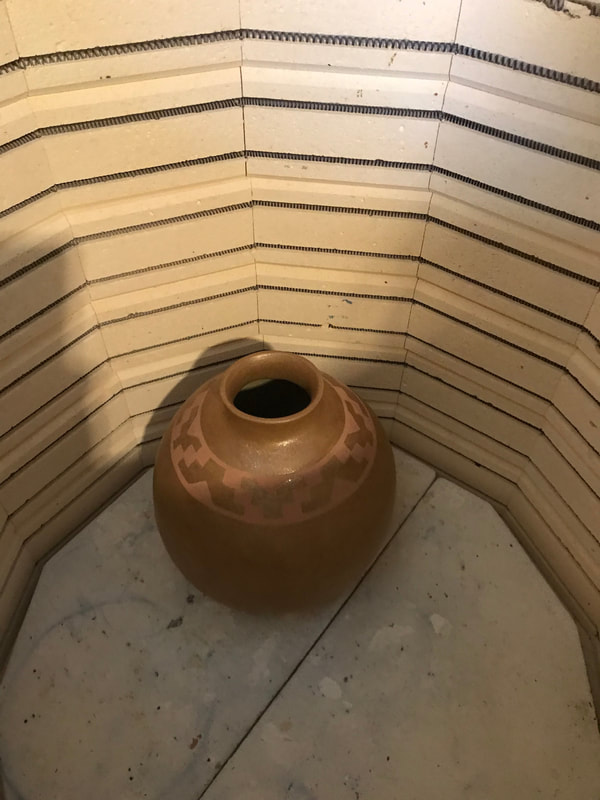
BISQUE FIRING
- Once the decorating has been completed.
- The pieces are completely dried out in a low temperature kiln bisque firing
- Do a 4 hour preheat
- Slow rise to a max of 950 F (Cone 022)
- No hold
- Allow to cool slowly - do not open kiln.
|
|
|
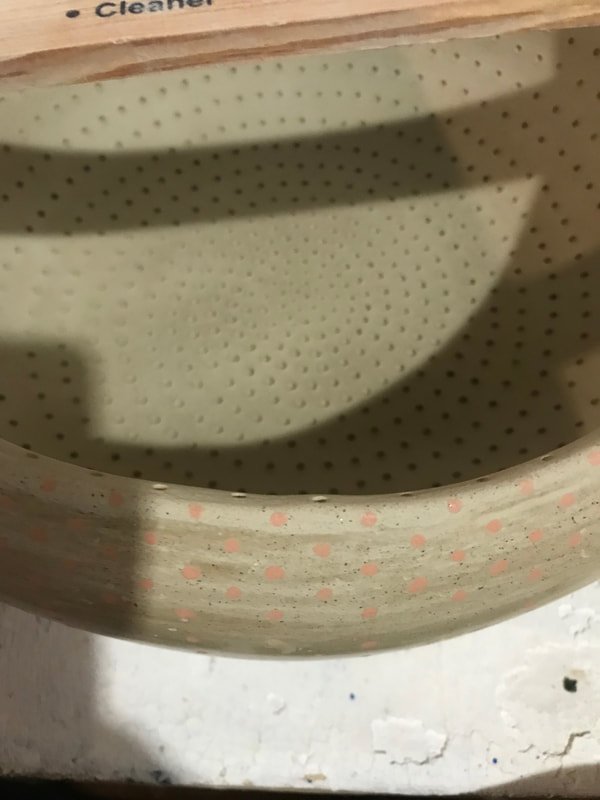
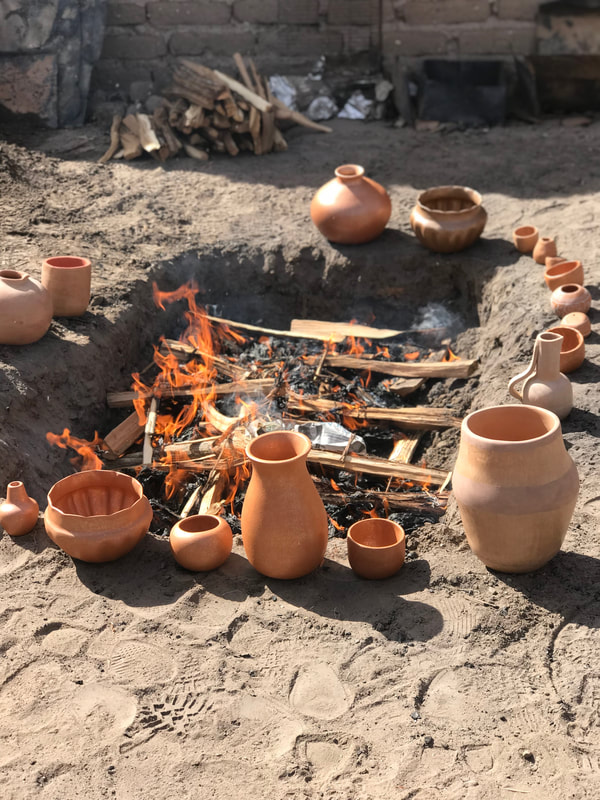
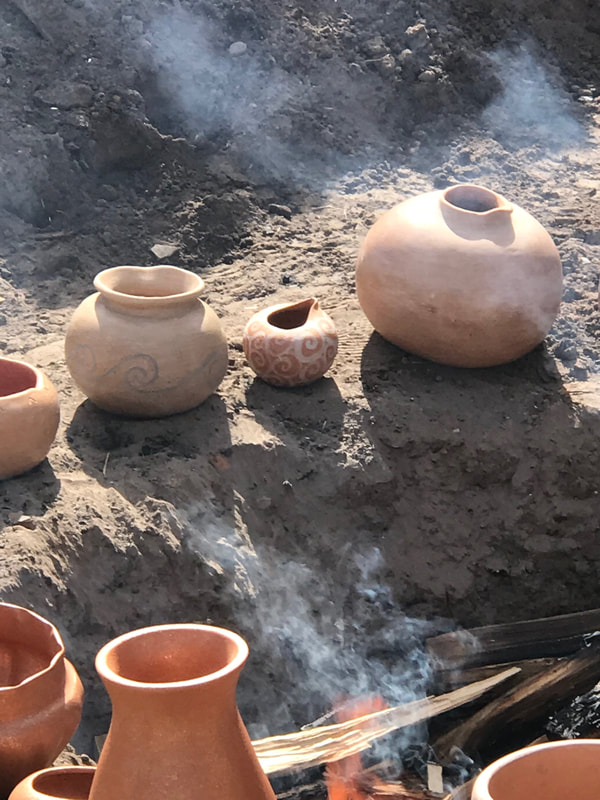
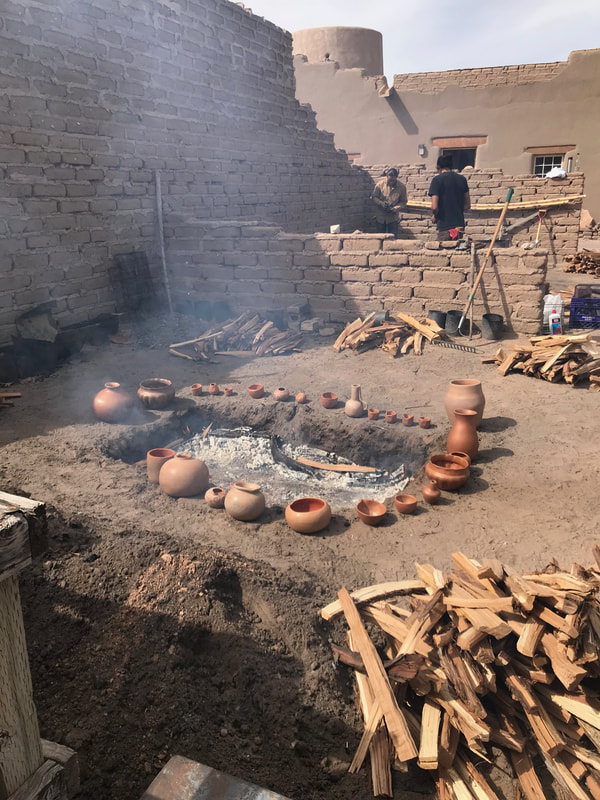
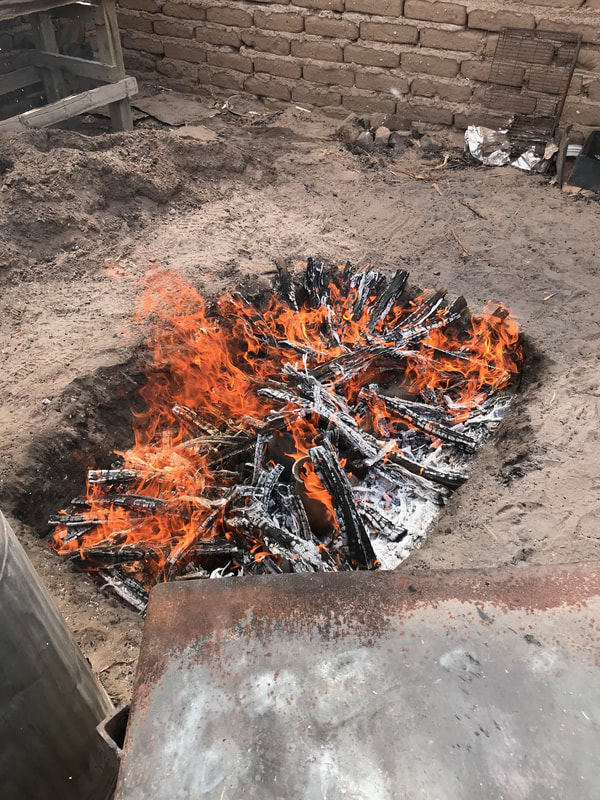
OPEN PIT FIRING @ Poeh Center (pronounced Pow-akee)
Oxidation – see the colors
Oxidation – see the colors
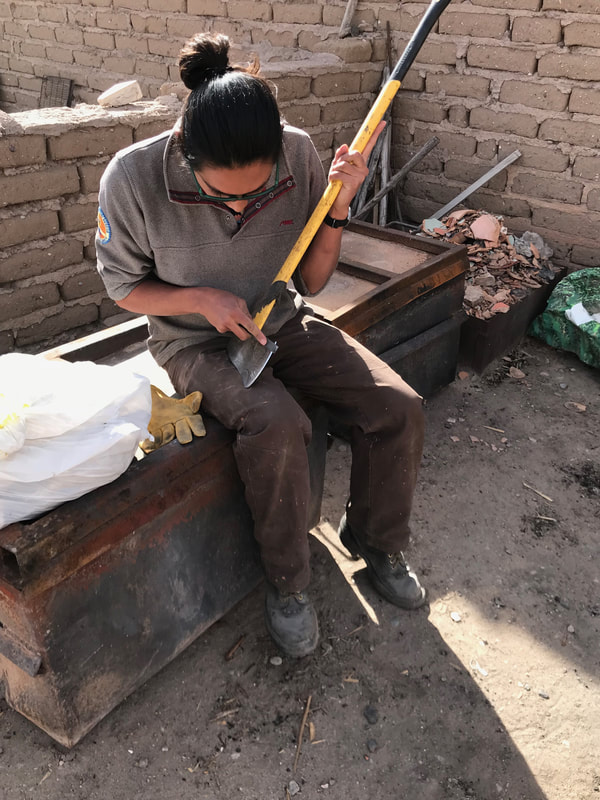
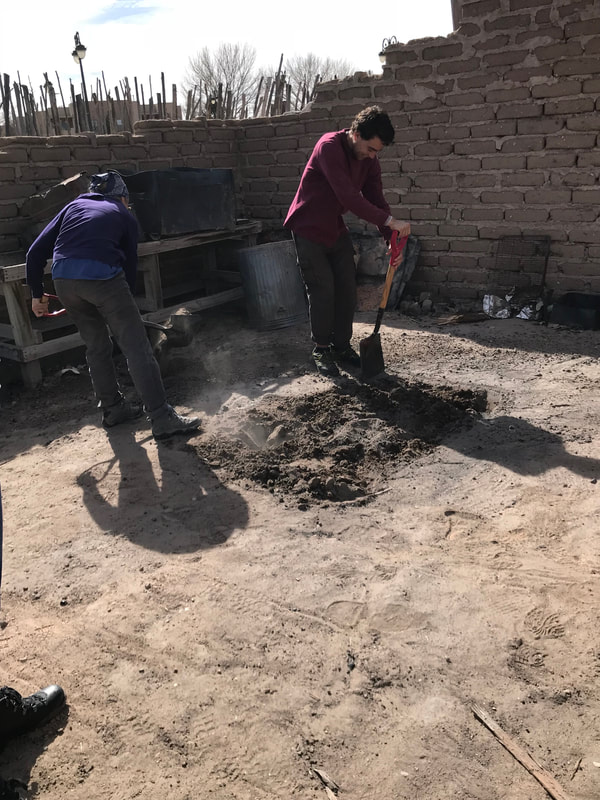
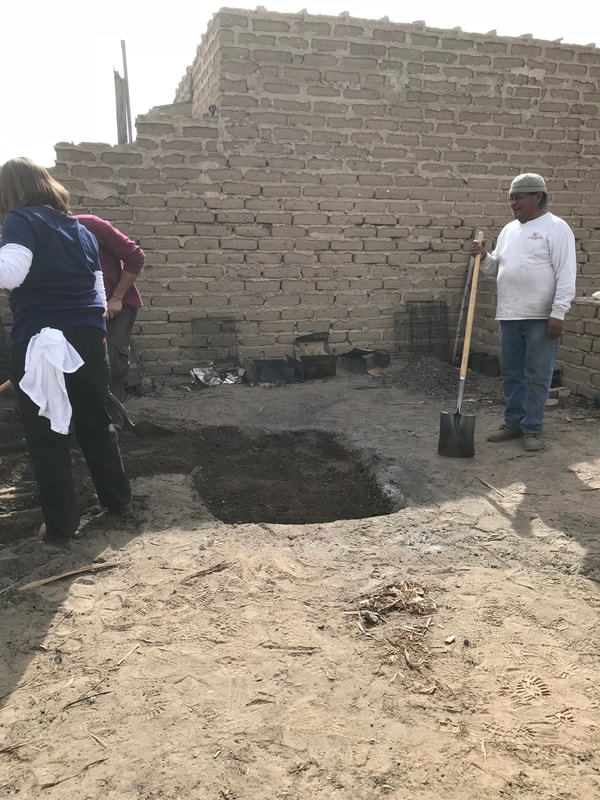
- Mark out and excavate a rectangular pit with straight sides. About a depth of a shovel (tallest pot).
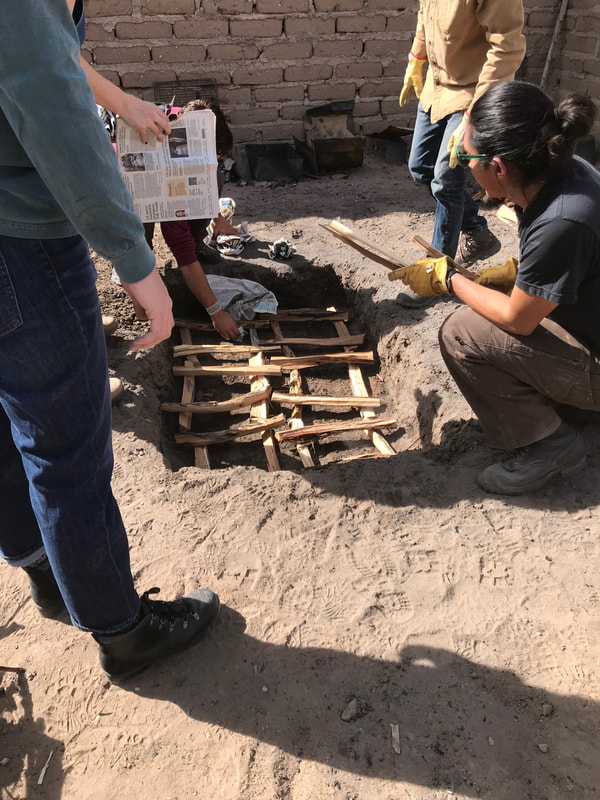
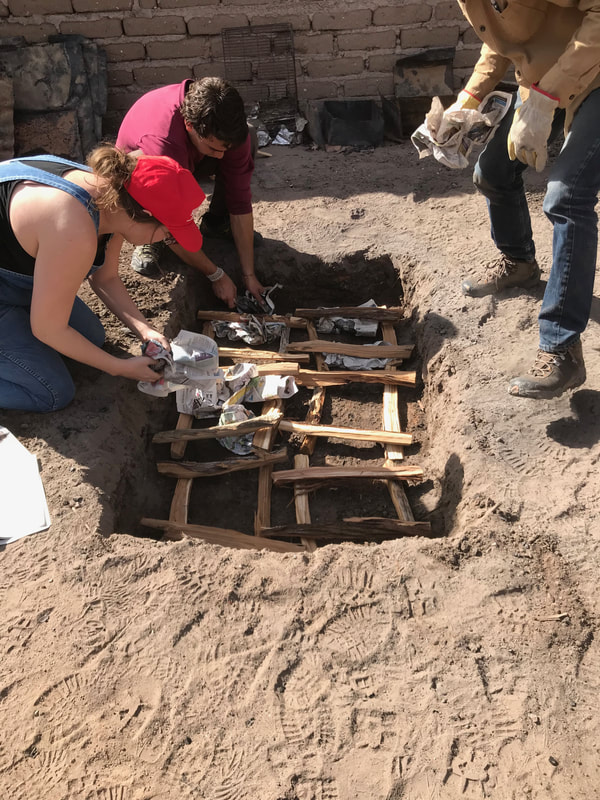
- Line the pit with a grid of kindling.
- Secure down crumpled up newspaper sheets under the kindling.
|
|
|
|
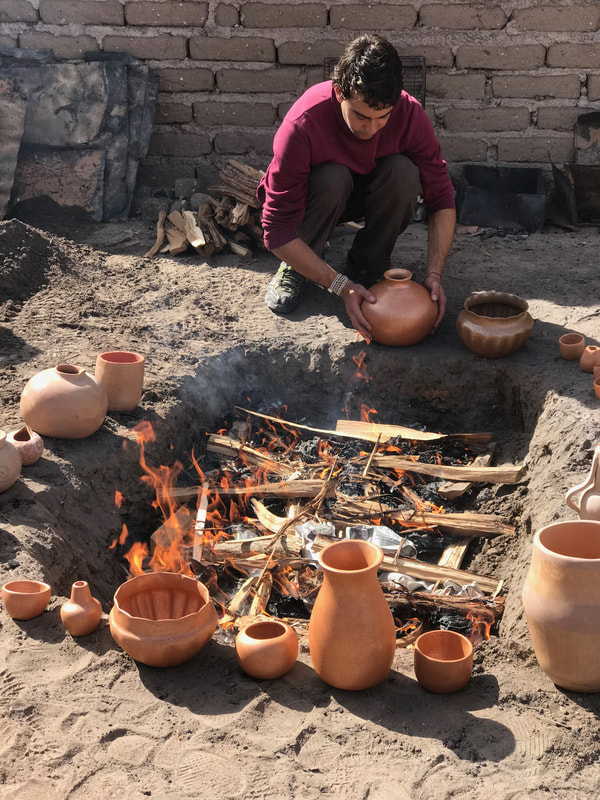
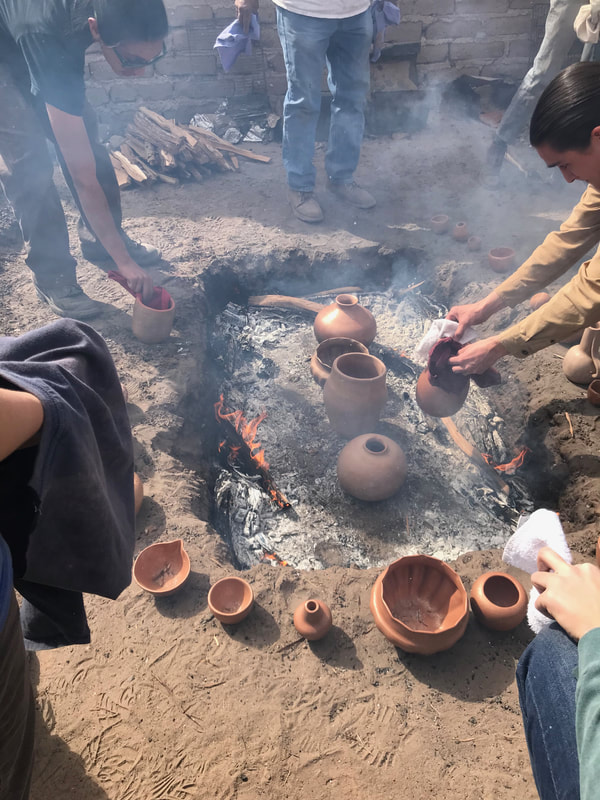
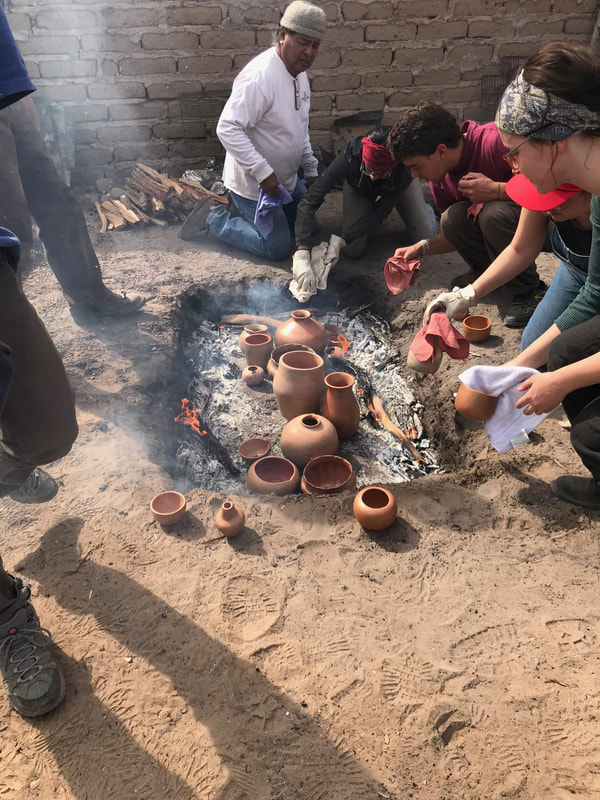
- Surround the pit with pieces to be fired
- Light the fire
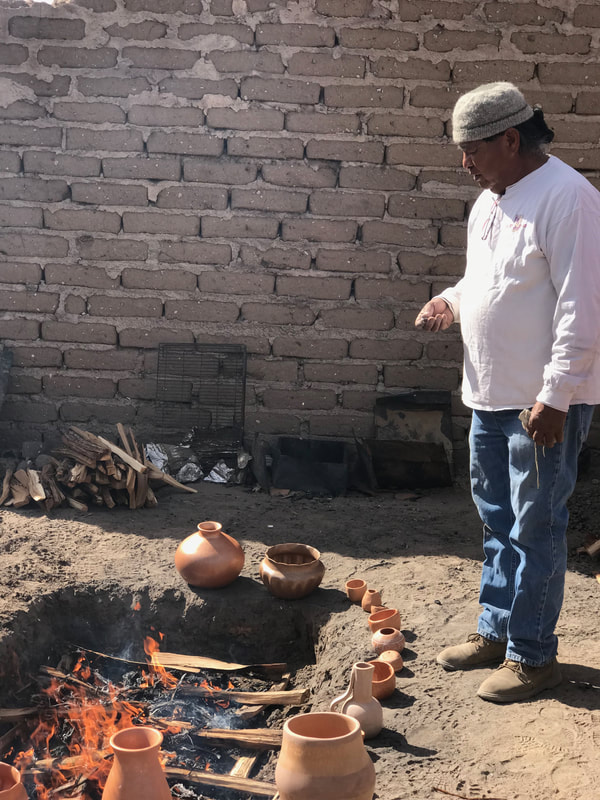
- Every 10 mins rotate each piece towards the fire a quarter turn in a clockwise direction.
- Make an offering and a prayer.
|
|
|
|
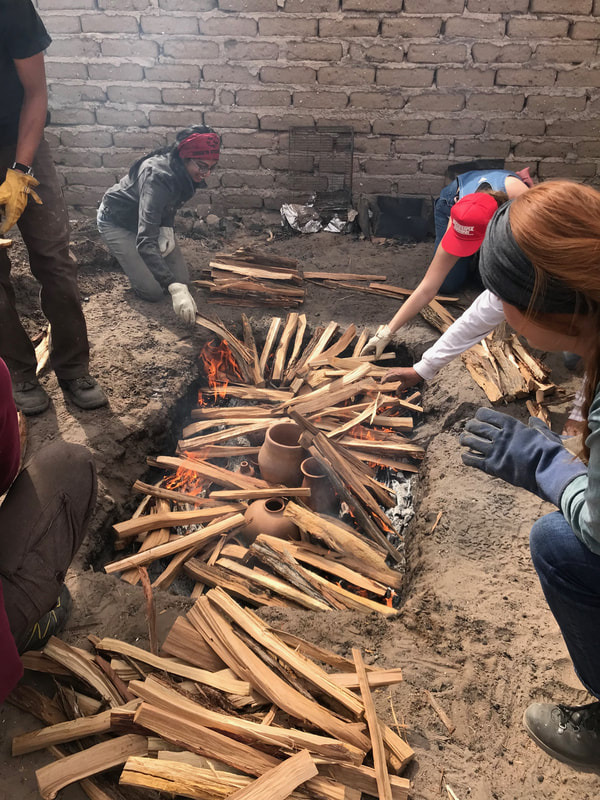
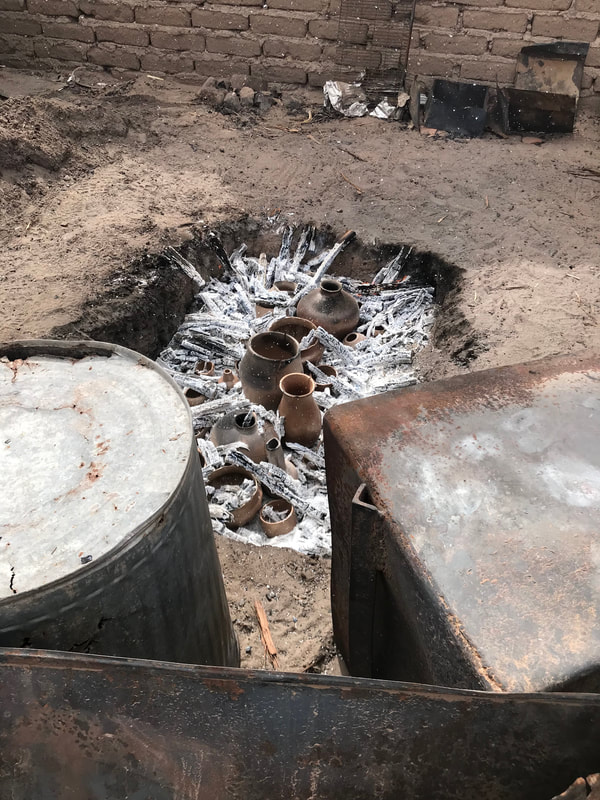
- When the pieces have completed the circle and are fully warmed by the fire,
- and the fire has died back to embers and ashes
- Using necessary precautions, Place the pieces in the fire pits
- Cover the pots with fresh kindling.
|
|
|
|
- Let the fresh kindling burn.
- Protect the fire from winds and surrounding areas from flying embers
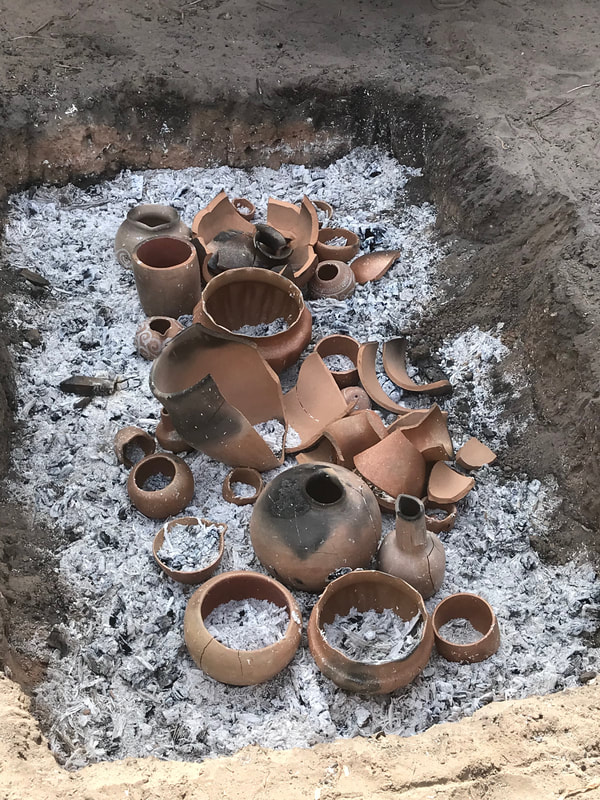
- Allow the fire to burn out and cool.
- Remove the pots
- Refill the pit
|
|
|
|
- 90% failure
- All Madrid clay items cracked
- All mica clay items survived
- The heat was too high for the Madrid clay
- Sudden gusts of air can shock the clay and break them.
- Cooling too fast.
|
|
|
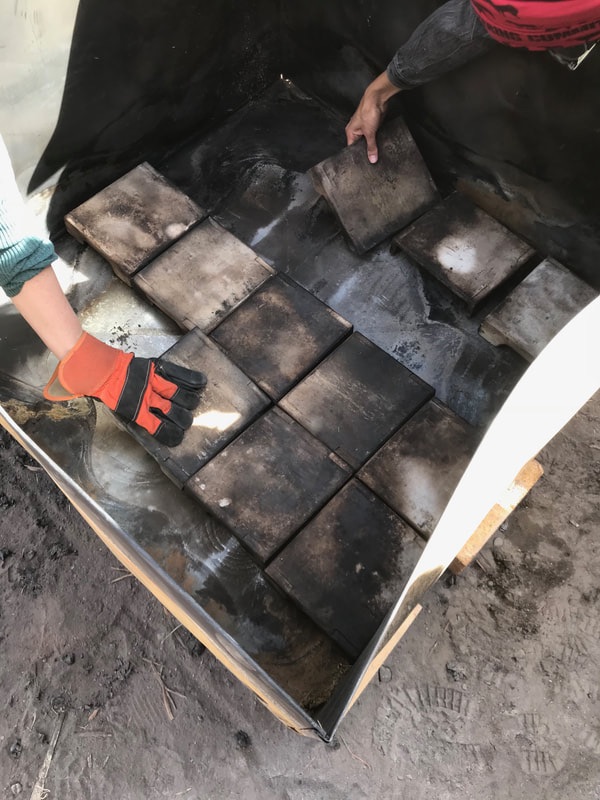
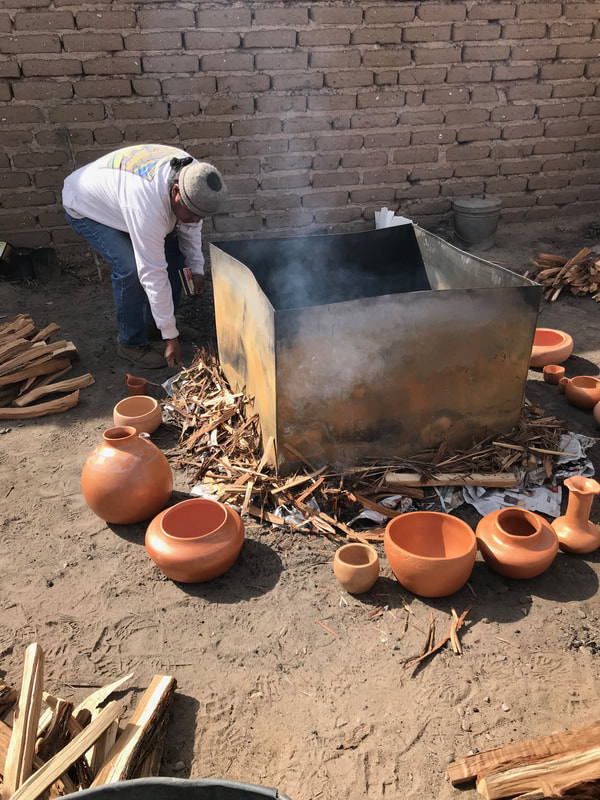
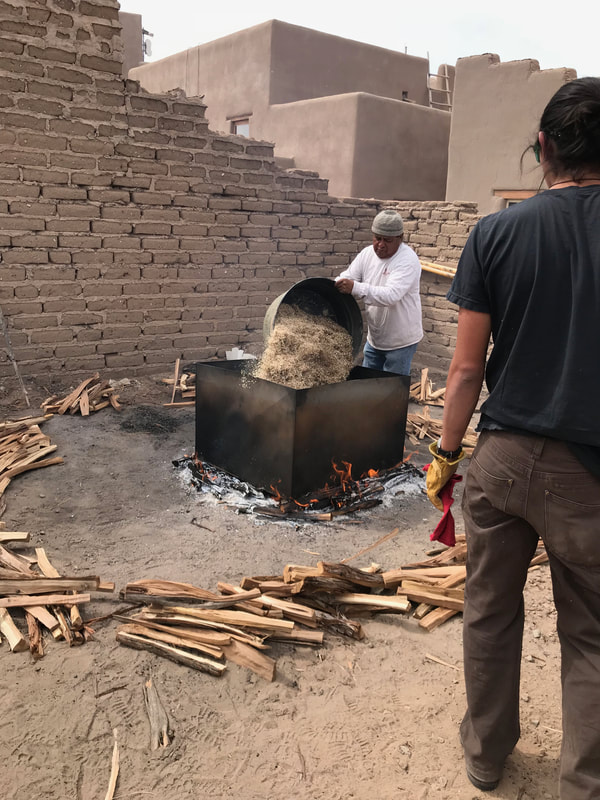
COVERED PIT FIRING
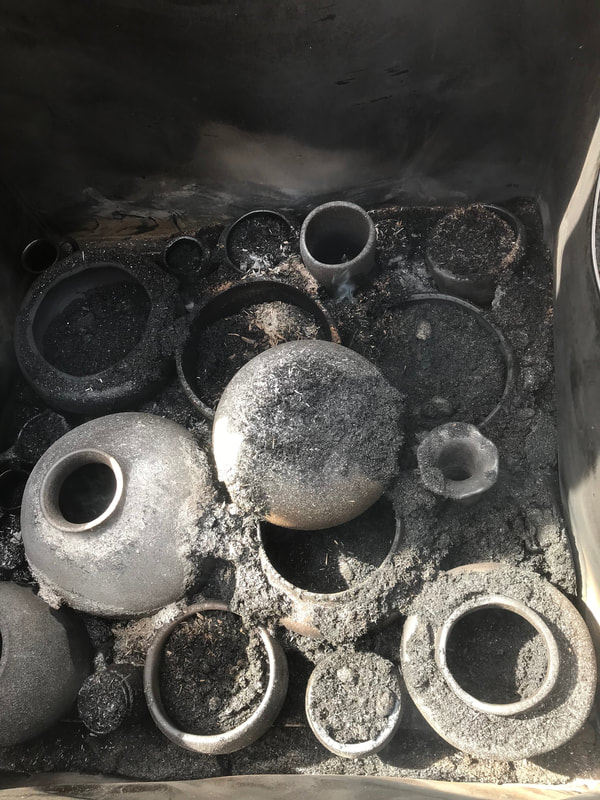
Reduction – carbonation of the surface produces black pots. Any painted decoration turns matte black. Polished pottery makes a shiny black/grey background. - see San Ildefonso Pueblo pottery.
Reduction – carbonation of the surface produces black pots. Any painted decoration turns matte black. Polished pottery makes a shiny black/grey background. - see San Ildefonso Pueblo pottery.
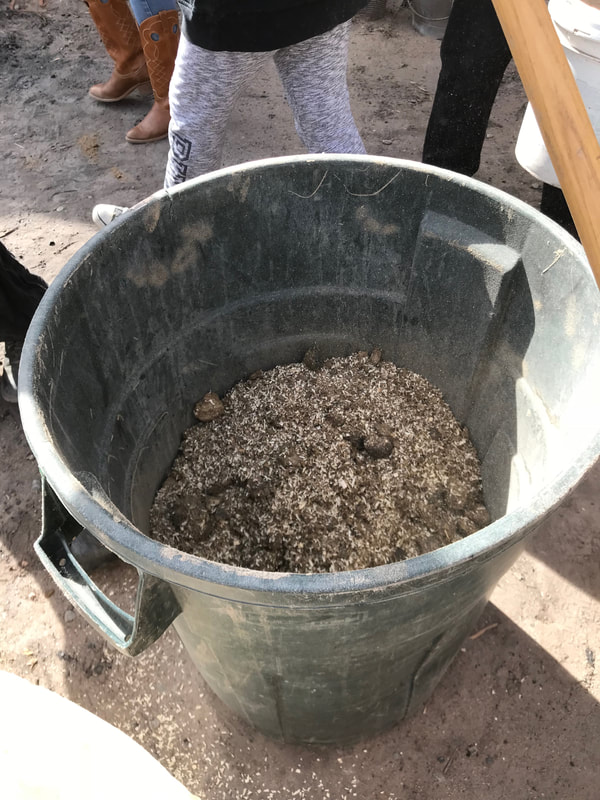
- Prepare a combustable mix of 50% sawdust and 50% dry manure
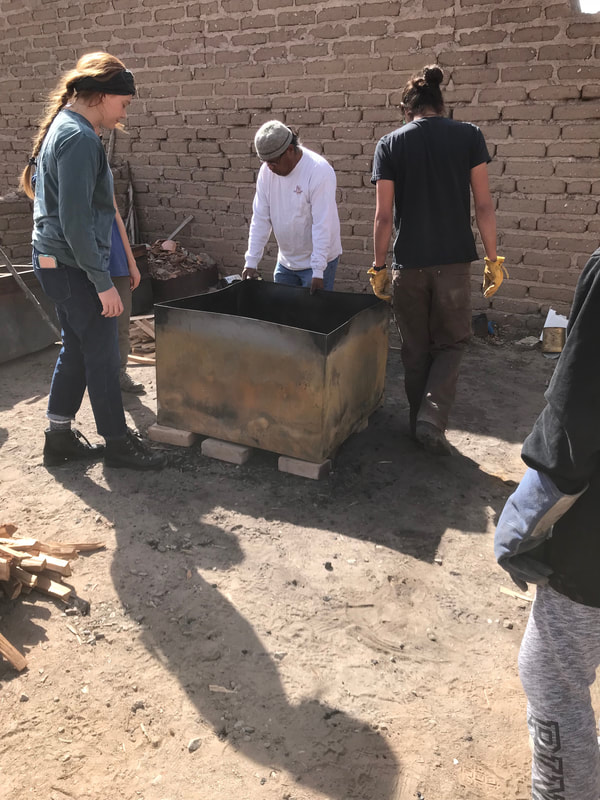
- Line the floor of a steel container (with lid) with fire bricks.
- Place the container on a grid of fire bricks with 4 spaces between
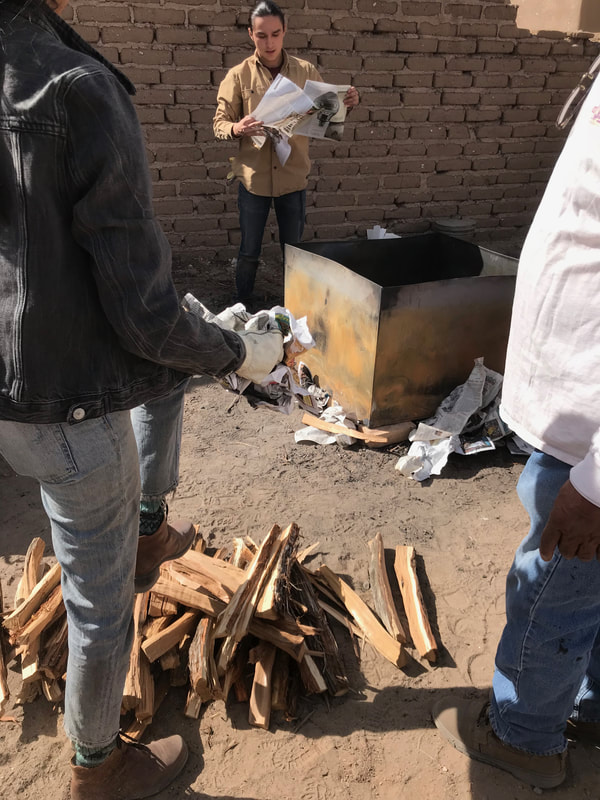
- Build up kindling and crumpled newspapers around base of container (paying attention to the corners)
|
|
|
|
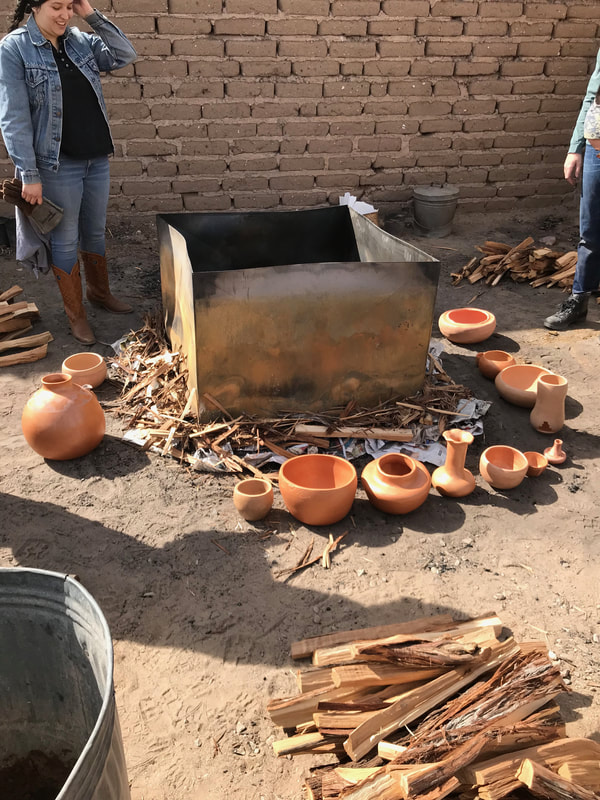
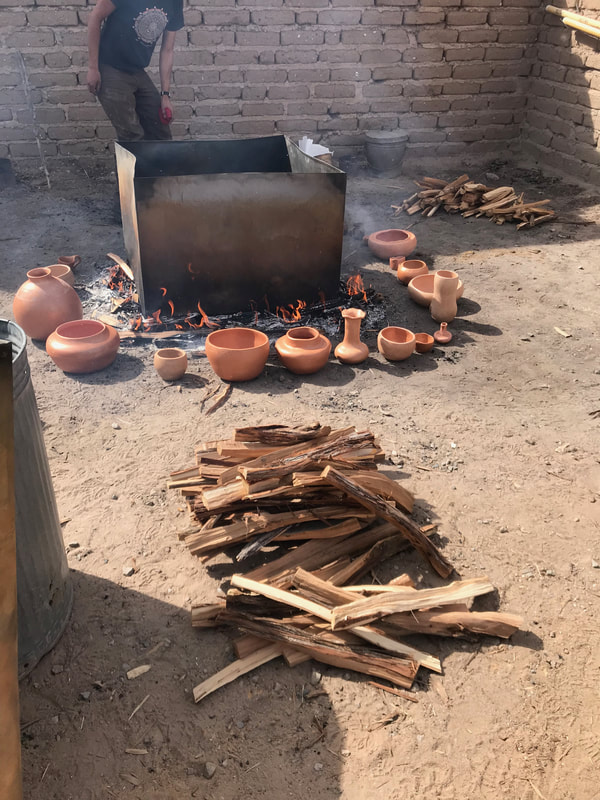
- Place all items to be fired around the base of the container
- Light the fire
- Every 10 mins, rotate each piece a quarter clockwise, to though roughly heat the items.
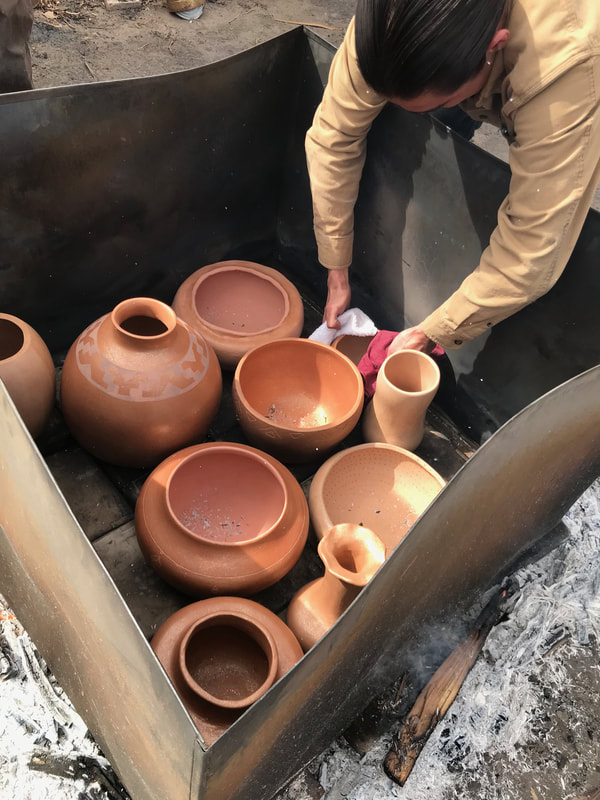
- Once full rotation has completed, place all pots within the steel container. They can be stacked and touching.
- Cover the container with a lid
|
|
|
|
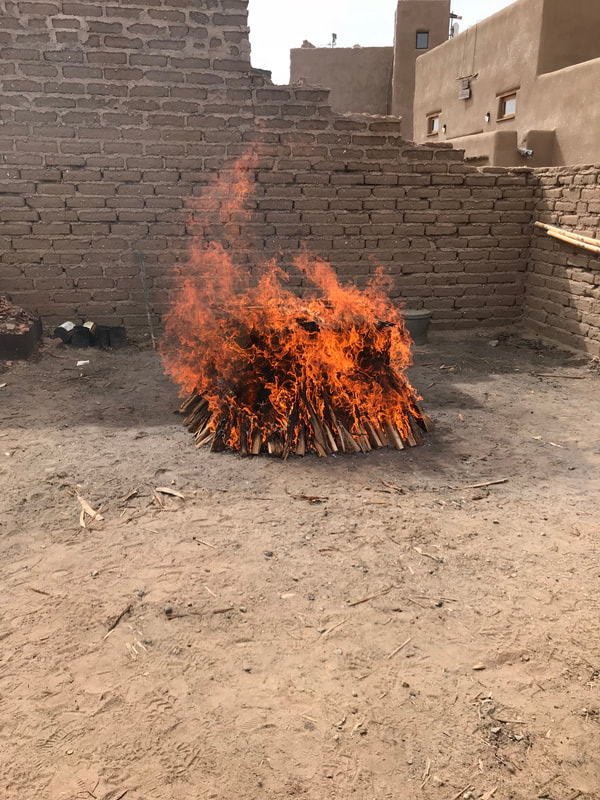
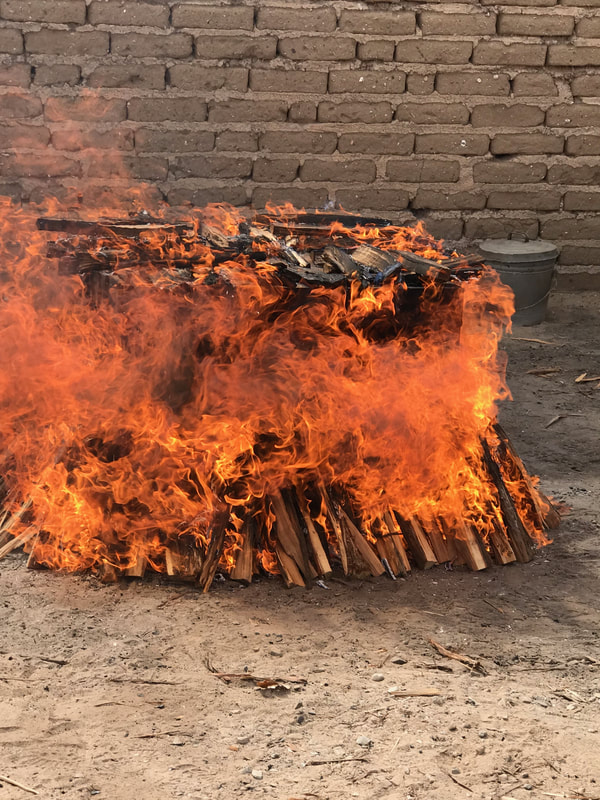
- Arrange kindling around the fire pit to keep feeding the fire and keeping it burning evenly
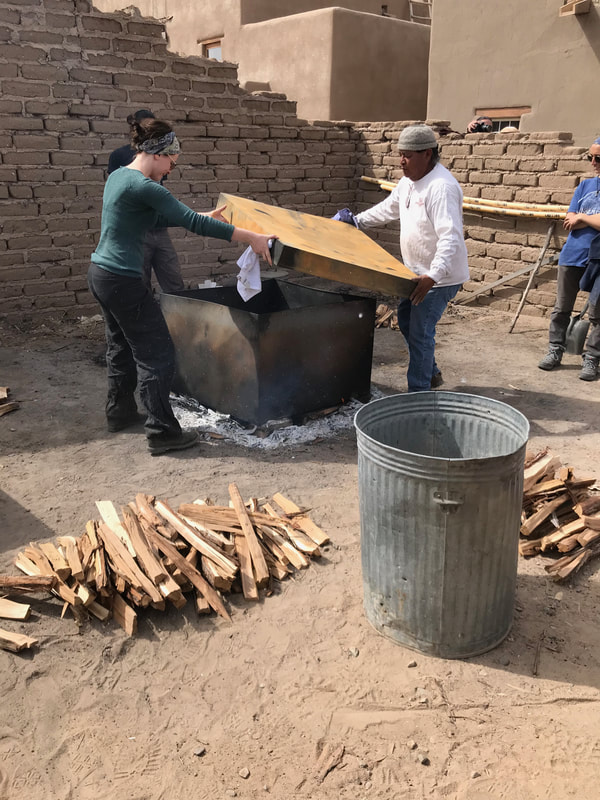
- Remove the lid
- Pour the mix of saw dust and manure over the entire contents.
- Replace the lid and cover with fire box with kindling
|
|

|

|
- Let the fire and kindling ignite and burn down
- Allow to cool before removing the lid
- Remove items carefully and still be conscious of letting things cool slowly - or they may crack.
|
|
|
|
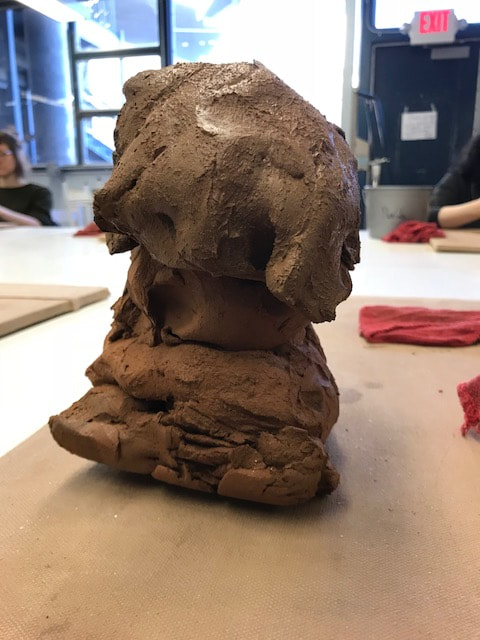
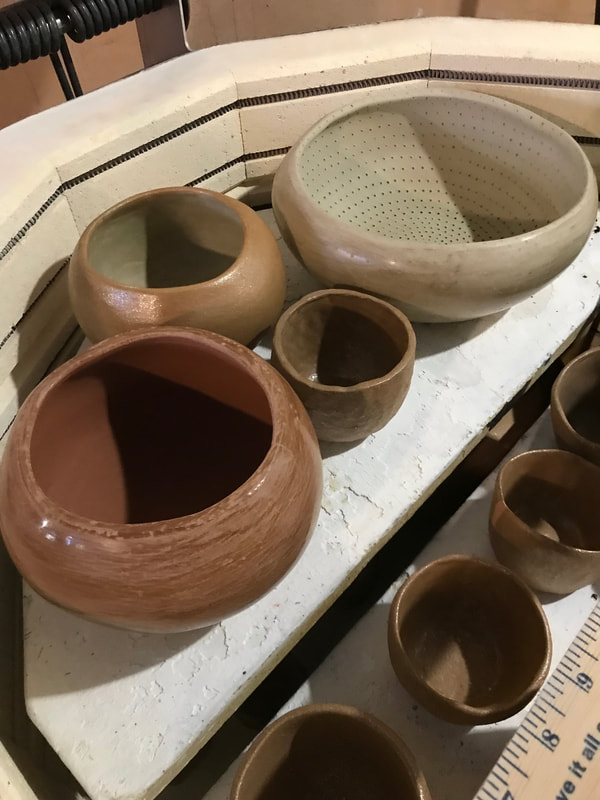
stages of madrid clay
Mother earth
Shaped
|
Soaking
Burnished
|
Drying
Bisqued
|

Blocking
reduction fired
|
|
Ref: SAR – School of Advanced Research - Indian Arts Research Center
has a collection of native pueblo pottery. They are arranged according to the different Pueblo languages: language. See variations in graphics, styles, colors and clays – true to each Pueblo ACOMA - Keres LAGUNA - Keres SANTA ANNA - Keres ZIA - Keres SANTA DOMINGO / KIWA - Bear paw on water containers - Keres COCHITI _ Keres TAOS AND PICURIS - Horse hair - Tiwa TESUQUE - tewa SANTA CLARA - Burnished black -Tewa OHKAY OWINGEH -Tewa SAN ILDEFONSO - Tewa others: Hopi, Zuni, Mojave, Ref: The Maxwell @ Anthropology Dept. UNM – collection of ancient, native pottery. Ohkay owingeh Pueblo – Formally San Juan Pueblo – Clarence Cruz - Tewa speaking Pueblo. Ref: http://www.sos.state.nm.us/Voter_Information/Native_American_Languages_in_New_Mexico.aspx FURTHER READING: 1880 HARVEY ART HOUSES - GALLUP LAURIE VIGIL MARY LANGUAGES: TIWA. TEWA, KERES, TOWA |
